How to Get Cliengo API Key & Integrate Cliengo with Salesforce Using MultiSync Made Easy

By Team MultiSync Made Easy
Published on April 29, 2026   |   Updated on May 4, 2026   |  
3 Mins Read
How to Get Cliengo API Key & Integrate Cliengo with Salesforce Using MultiSync Made Easy

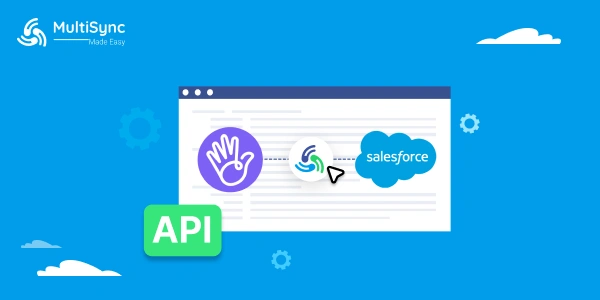
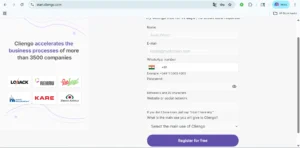
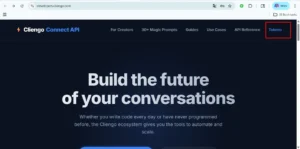
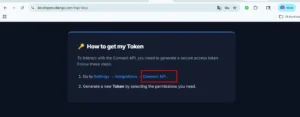
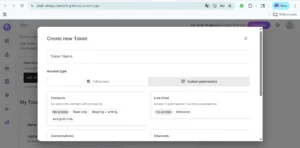
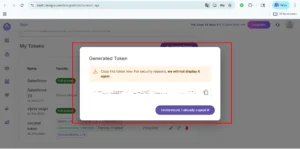
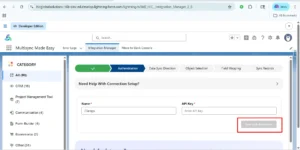
Integrating Cliengo with Salesforce helps businesses capture, manage, and act on customer conversations in real time. To enable this connection, you first need to generate a Cliengo API key and securely connect it using a reliable Salesforce integration tool.

In this guide, you’ll learn how to get the Cliengo API key and integrate it with MultiSync Made Easy, allowing seamless data sync, automated workflows, and improved lead management without manual effort. Let’s check out the steps one by one. 

First, how to get a Cliengo API key:

Step 1: First, sign in to your Cliengo account, and if you don’t have one, create a new account on Cliengo, fill in all the details and register.

create a new account on Cliengo

Step 2: In the next step, after filling in all the details, you will see a dashboard like this.

cliengo dashboard

Step 3: Here, click on this link to find the API key: https://developers.cliengo.com/ and then click on the Tokens.

cliengo click on the Tokens

Step 4: After going to the token section, click on ‘Connect API’ and click on ‘+ Create token’.

Connect API

Create token

Step 5: After that, click on ‘Create Token‘, fill in all details like token name and choose the custom permissions, and click on ‘Generate Token‘.

Generate Token

Step 6: After completing these steps, the API key will be generated. Copy and securely store your generated token for future use.

generated token for future

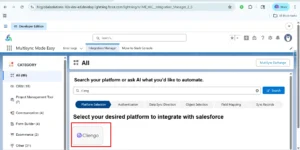
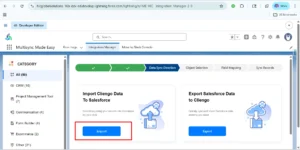
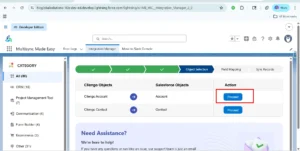
Now, the second thing is how to integrate Cliengo and MultiSync Made Easy.

Step 7: Log in to Salesforce and go to the MultiSync Made Easy page and click on ‘All’ and search Cliengo.

search Cliengo

Step 8: After choosing Cliengo, enter the API Key and click on Save & Authenticate.

API Key and click on Save & Authenticate

Step 9: After clicking on Complete Authentication, you will see the Data Sync Direction dashboard, as shown below. Next, click on Import.

Complete Authentication

Step 10: After clicking on Import, you will see the Object Selection dashboard. Click on Proceed.

Click on Proceed

Step 11: Now, click on Preview Mapped Data, and in the Field Mapping, click Validate Field Mapping and then Save Field Mapping, respectively.

Preview Mapped Data

Validate Field Mapping

Save Field Mapping

Step 12: In the next step, click on the Sync Data button.

Sync Data

Step 13: Finally, you’ll see a dashboard where you will see the Batch Status Completed

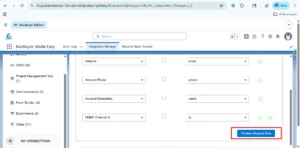
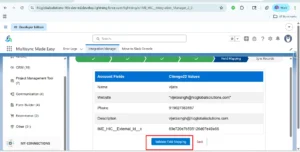
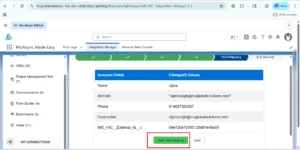
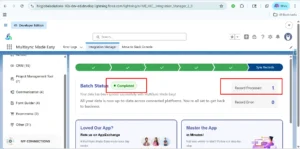
The data from MultiSync Made Easy has been synced with Cliengo successfully. The record was created successfully, and the data has been generated.

Batch Status Completed

Conclusion

Integrating Cliengo with Salesforce ensures that your customer conversations, leads, and engagement data flow seamlessly into your CRM for better visibility and faster decision-making. By automating this process, businesses can eliminate manual data entry, reduce errors, and respond to prospects more efficiently.

With a powerful Salesforce integration tool like MultiSync Made Easy, you can not only connect Cliengo effortlessly but also manage multiple integrations from a single platform. Whether you’re scaling operations or optimizing workflows, MSME helps you build a connected, automated ecosystem.

By leveraging data migration and Salesforce integration with MultiSync Made Easy, you can create a true 360° data view, connecting apps, automating processes, and driving smarter business outcomes in 2026 and beyond.

The All-in-One Salesforce Connector for Future Businesses

Step ahead with our robust and intelligent app that instantly integrates multiple platforms — even the unknown ones!

Salesforce Connector