Setting up the Multi Sync Made Easy app for HubSpot integration with Salesforce is a seamless way to synchronize your data across platforms. This HubSpot Salesforce integration tool enables easy syncing between HubSpot and Salesforce, ensuring that your data stays organized, up-to-date, and fully integrated. This Multi Sync Made Easy User Guide for HubSpot walks you through each step of the process, from installation to data syncing.
By following the steps outlined in this guide, you will be able to effortlessly connect your Salesforce CRM tool to HubSpot, making sure both systems stay in sync. Whether you’re importing or exporting data, this guide will provide you with everything you need to get started.
From finding the app on AppExchange to connecting it with your Salesforce and other platforms, we will cover everything you need to get started and ensure smooth integration.
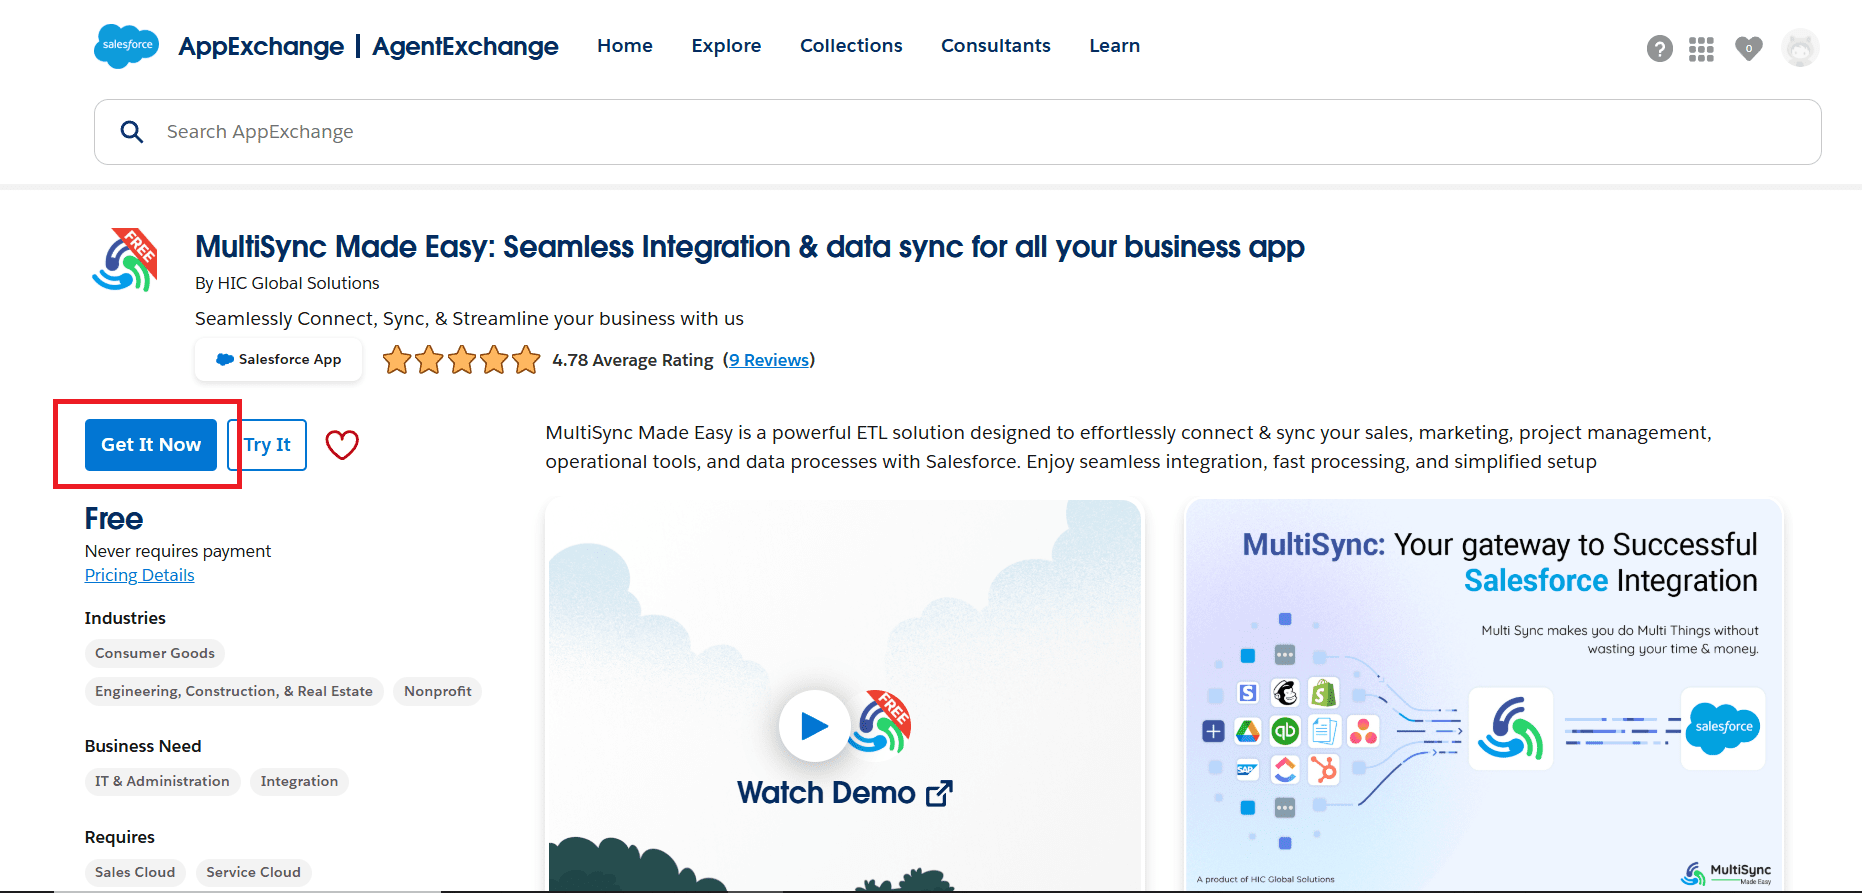
Step 1. Start the process by visiting AppExchange.
Step 2. Search Multi Sync Made Easy.
Step 3. Click on get it now.
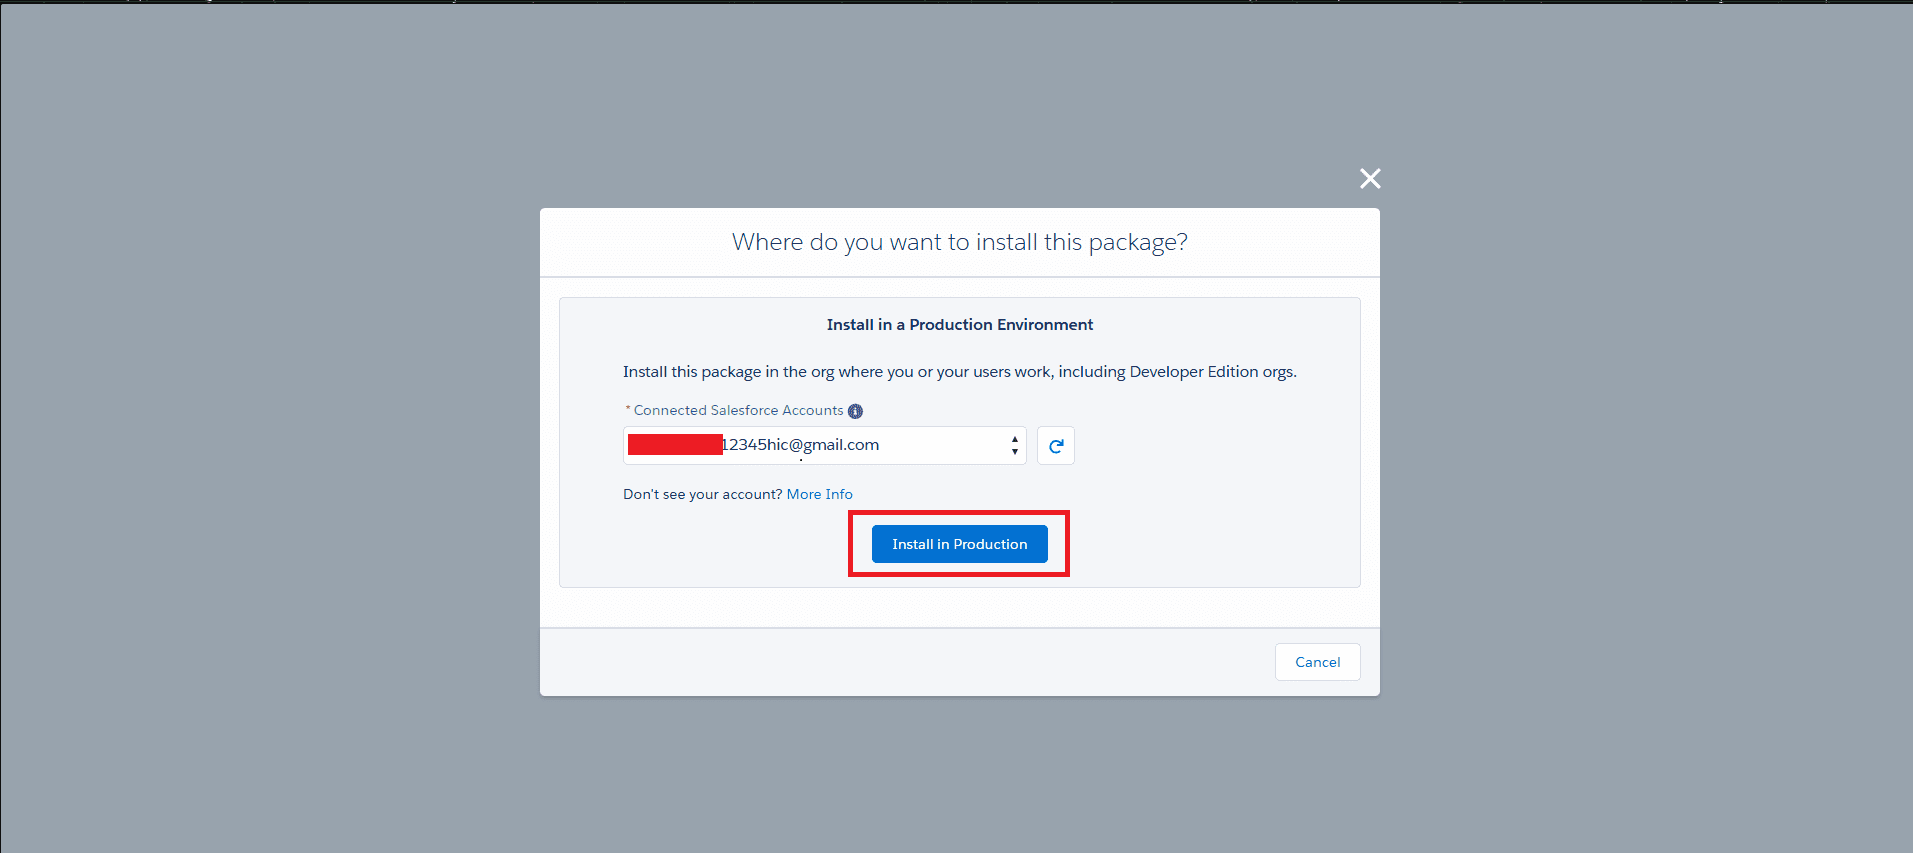
Step 4. Connect to your Salesforce developer account / Production Environment.
Step 5. Click on Install in production.
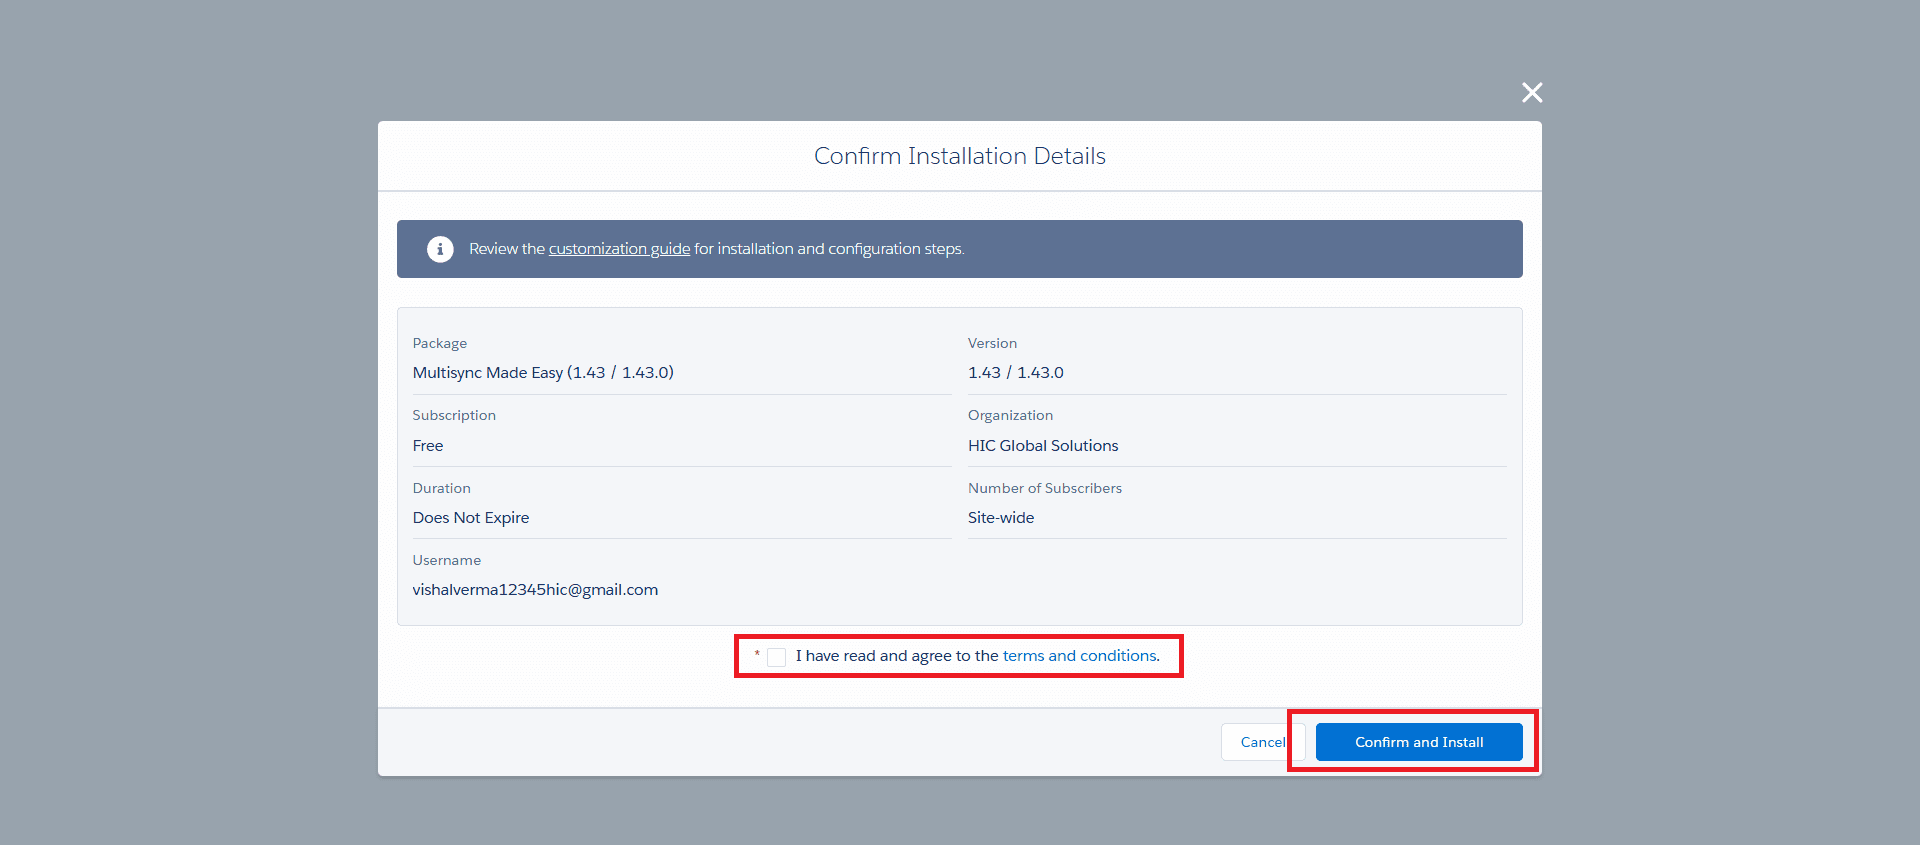
Step 6. You will be redirected to the Confirm Installation Details Page.
Step 7. Check the given checkbox.
Step 8. Click on Confirm and Install.
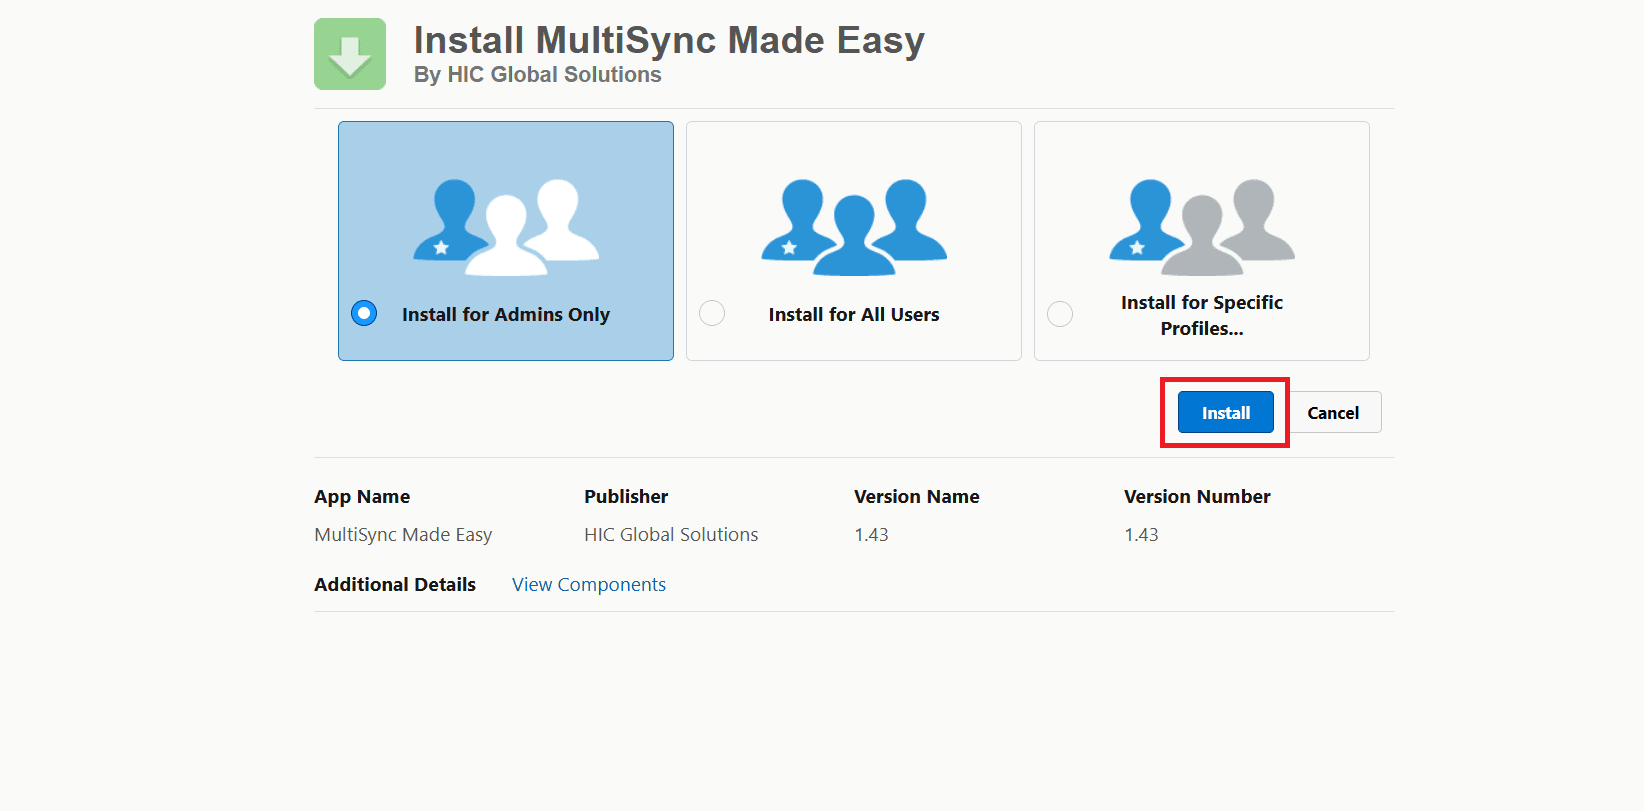
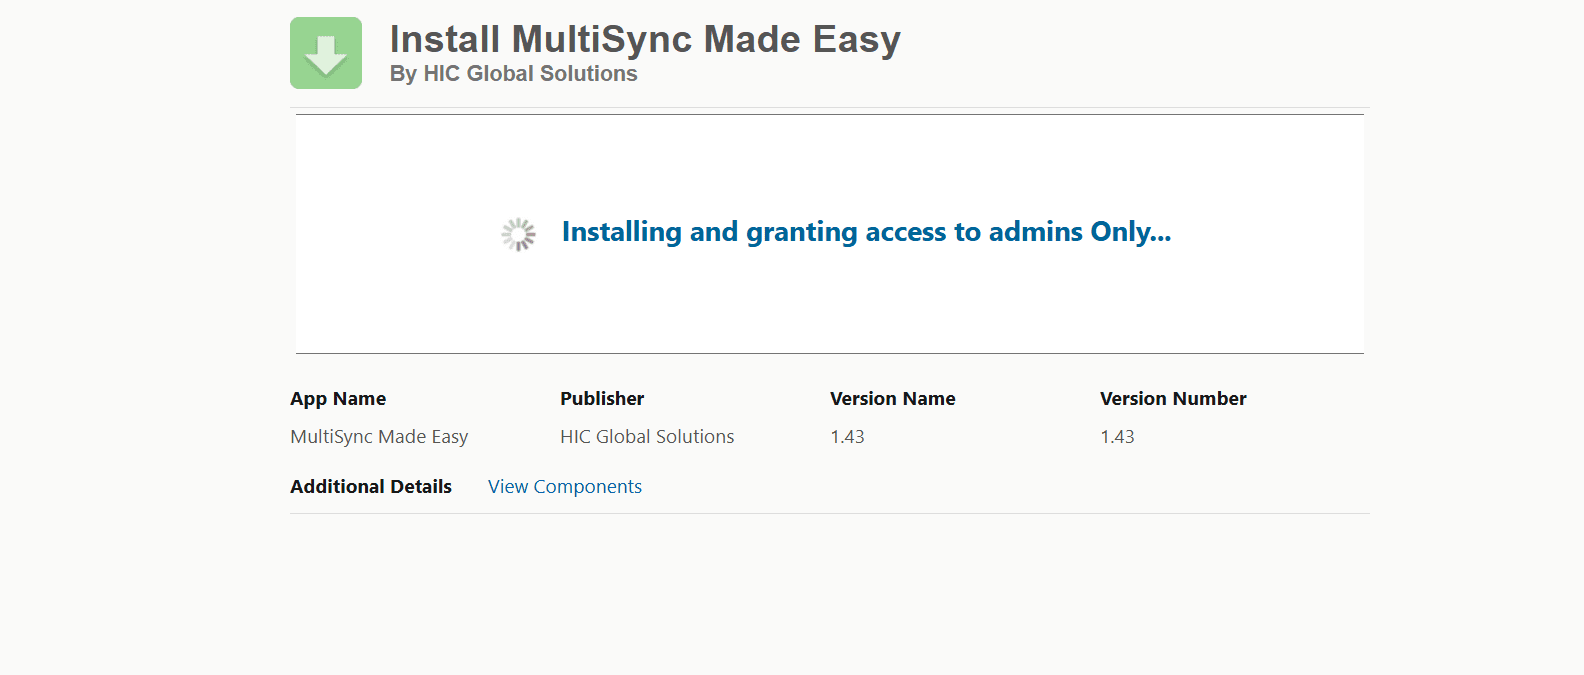
Step 9. Installation Screen Appears.
Step 10. Select the Installation Profile according to your needs.
Step 11. Click on the install button.
Step 12. Once installation is complete, then in the App launcher search Multi Sync Made Easy and click on your app.
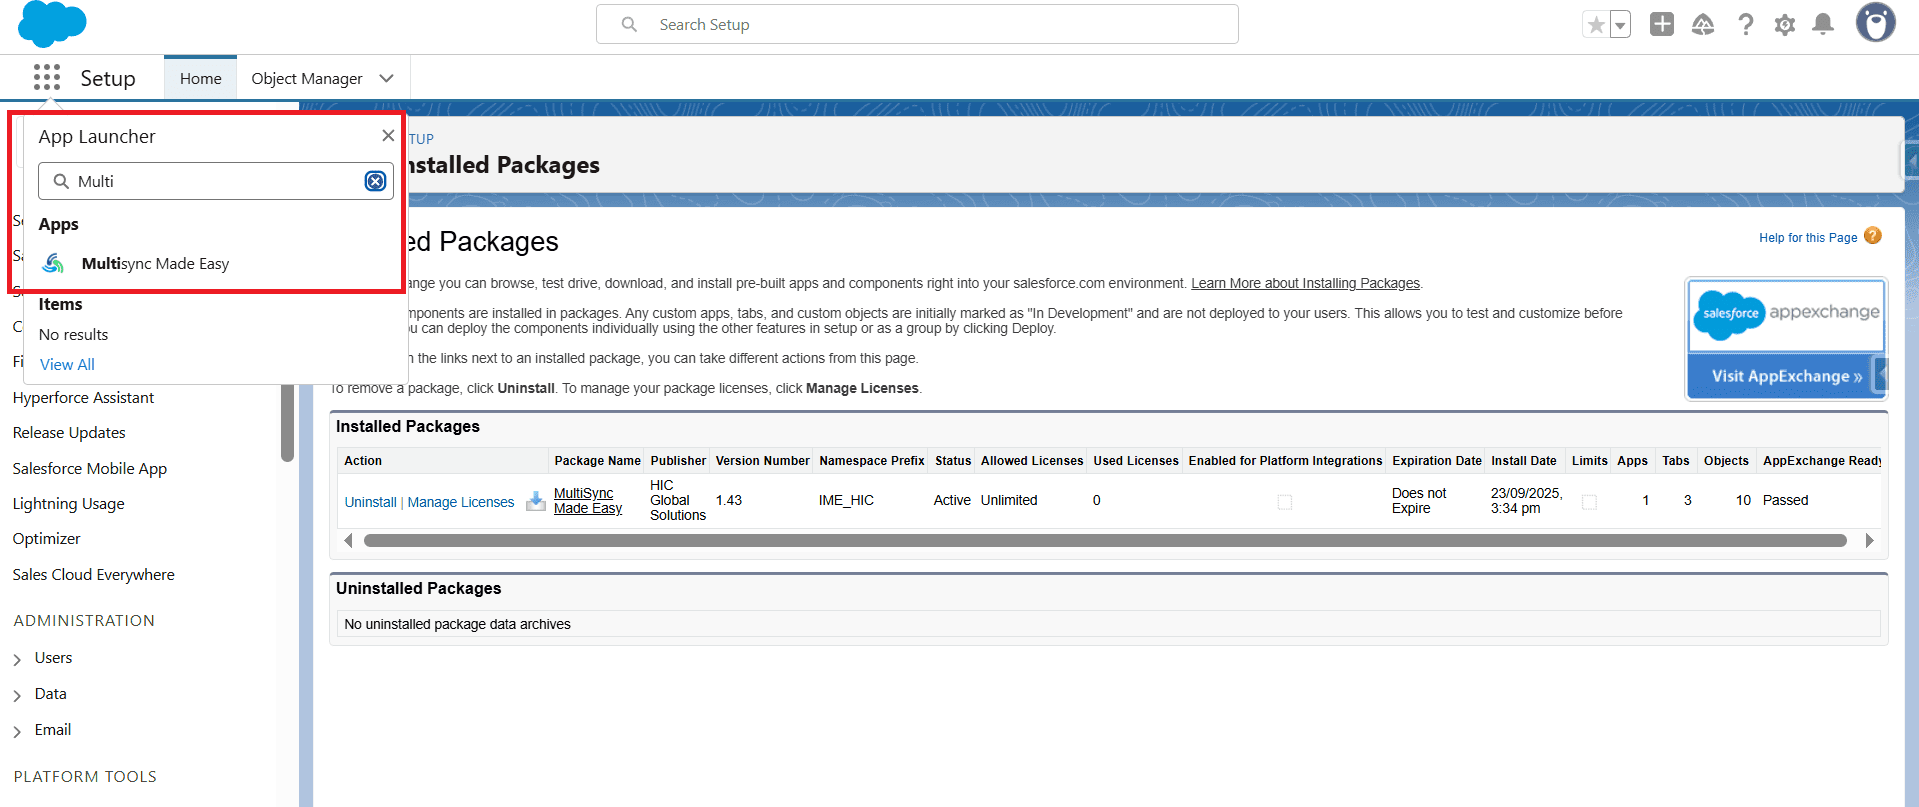
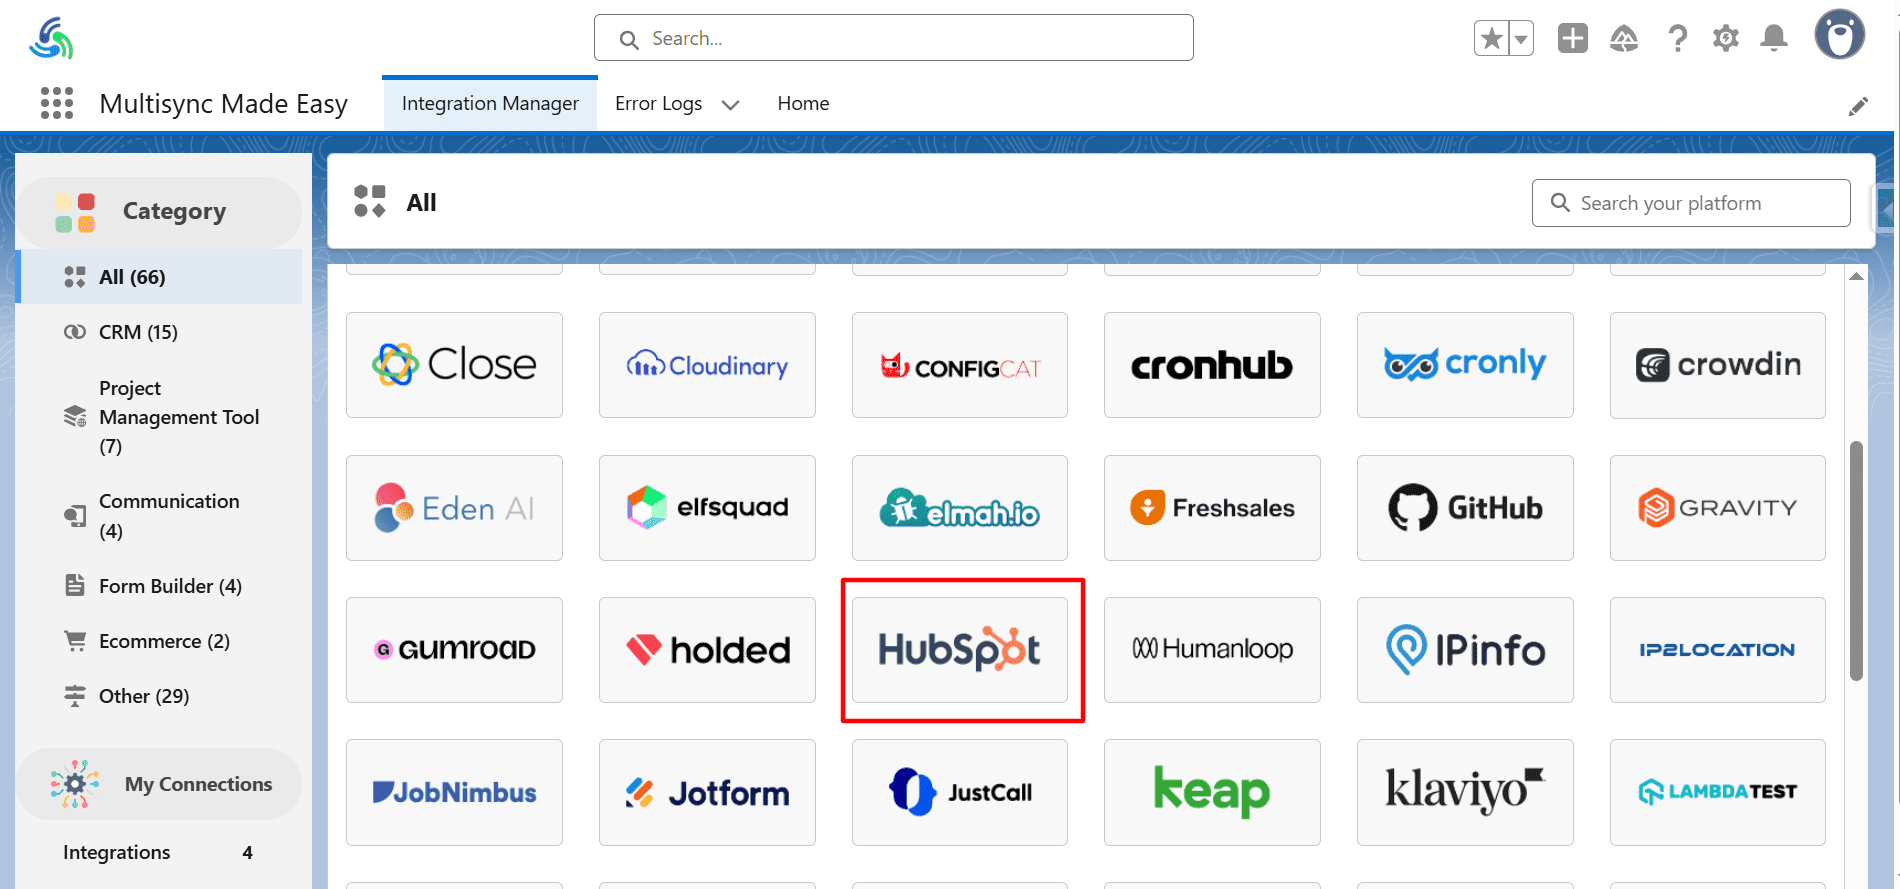
Step 13. You will be redirected to the Integration Manager Page.
Step 14. Select your desired platform (here we select HubSpot) and click on it.
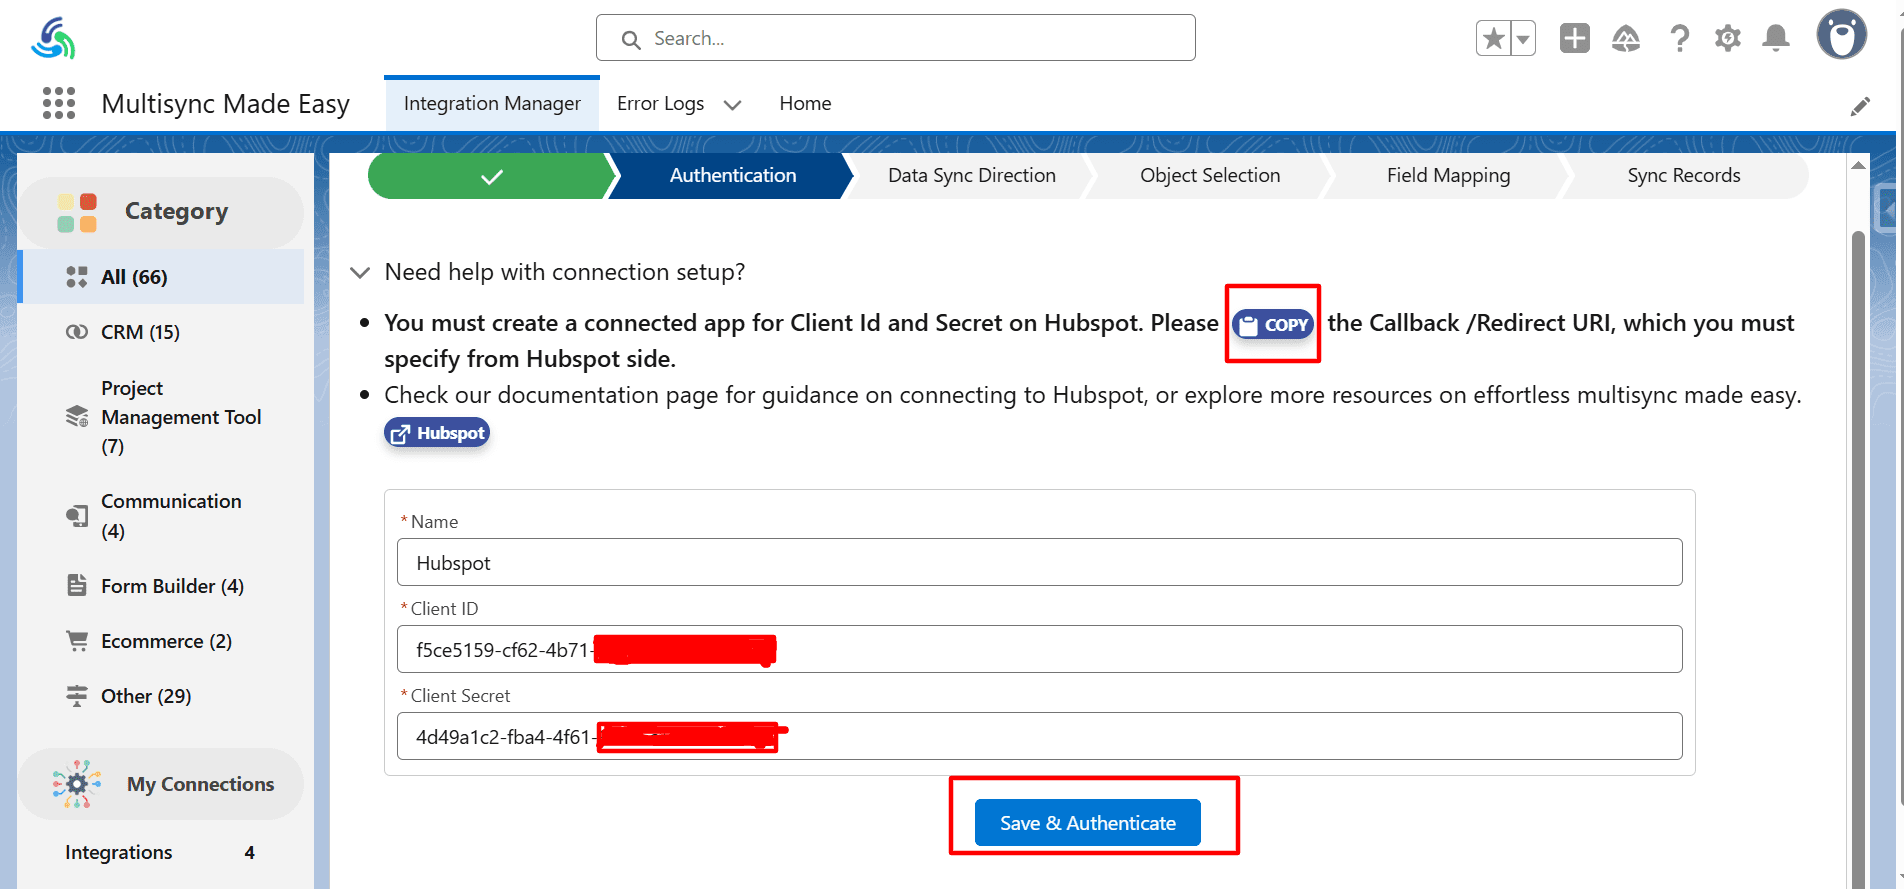
Step 15. For the redirect_uri / callback_url, click the copy button, and the URL will be copied to your clipboard. Use this redirect_uri in the connected app of the related platform.
Step 16. Add your Client ID and Client Secret in the given fields.
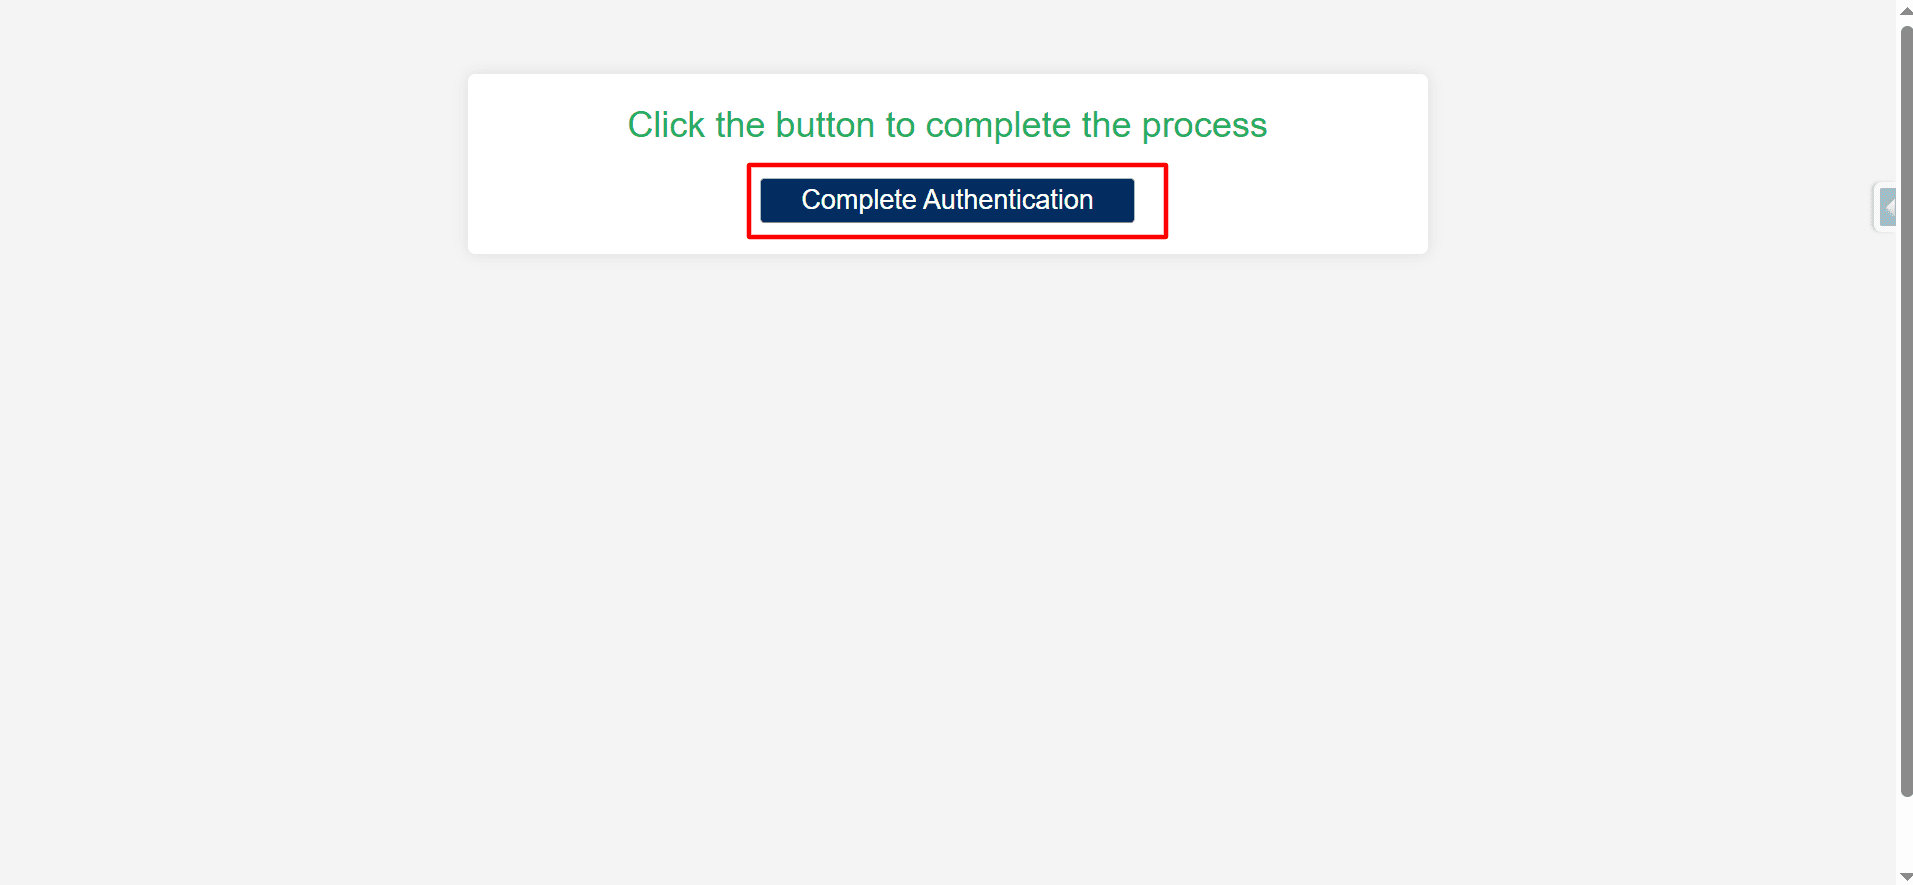
Step 17. Click on Save and Authenticate.
Step 18. After clicking on Save & Authenticate, you will be redirected to the page below, where you will click on the Complete Authentication button.
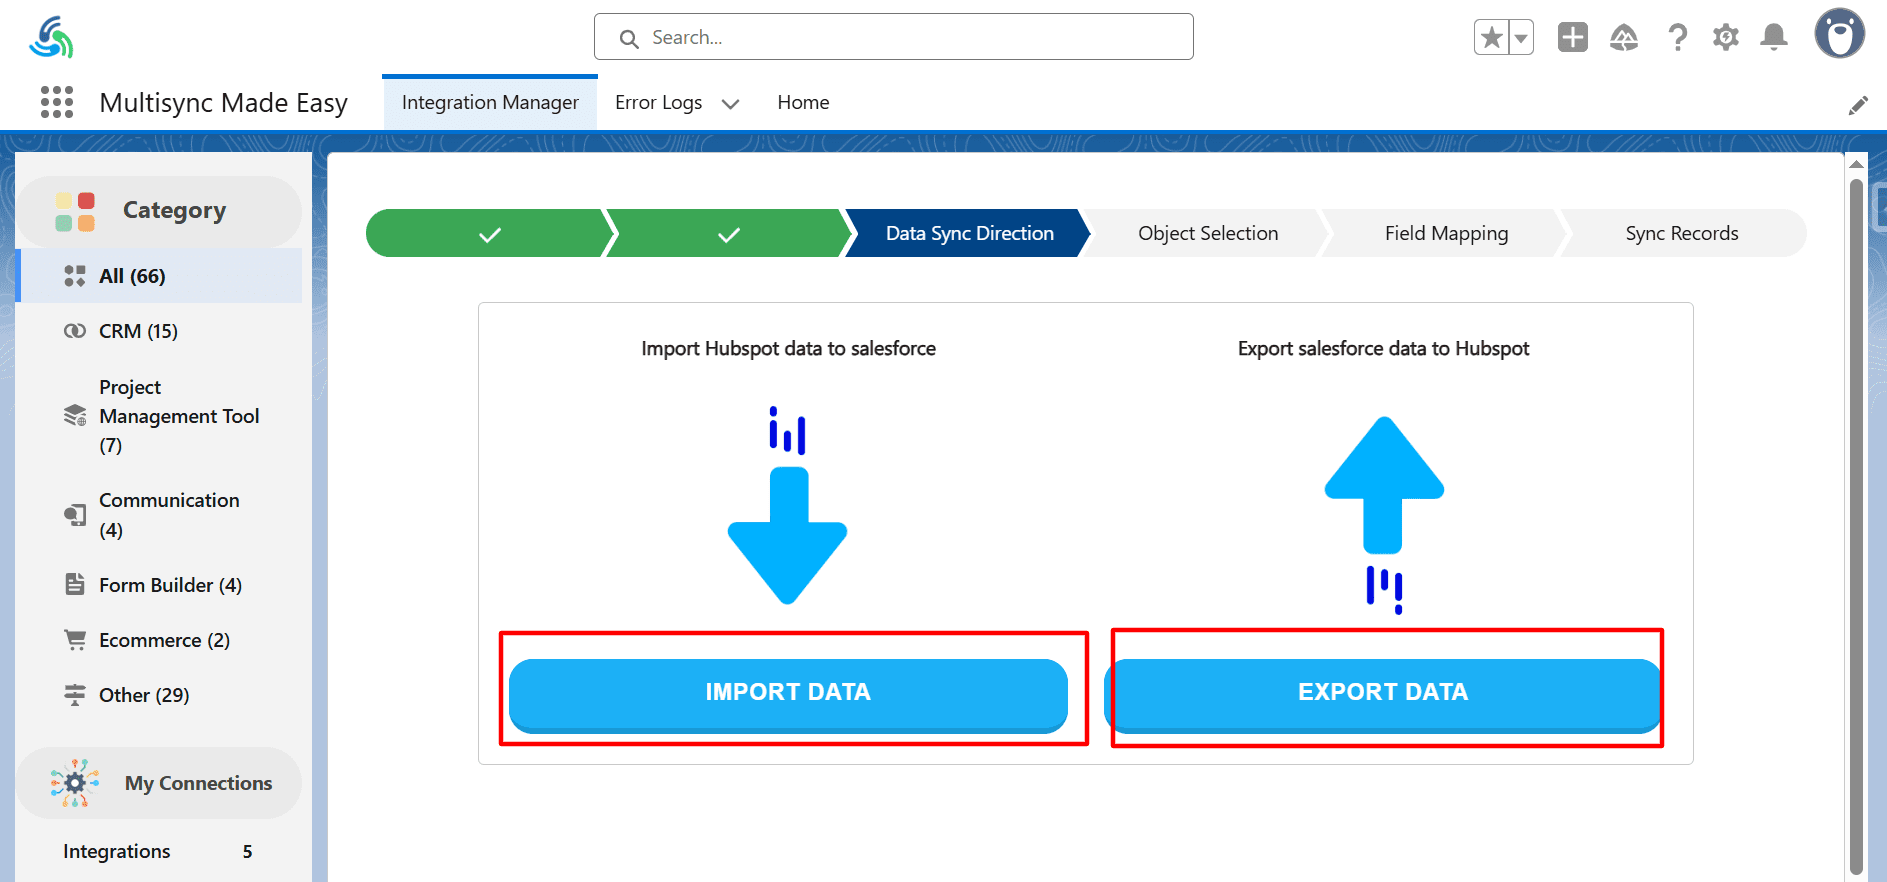
Step 19. Select the Flow of data, such as importing data from the connected app or sending some data to the connected app.
Step 20. After clicking on Import Data, you will be redirected to the Object Selection page.
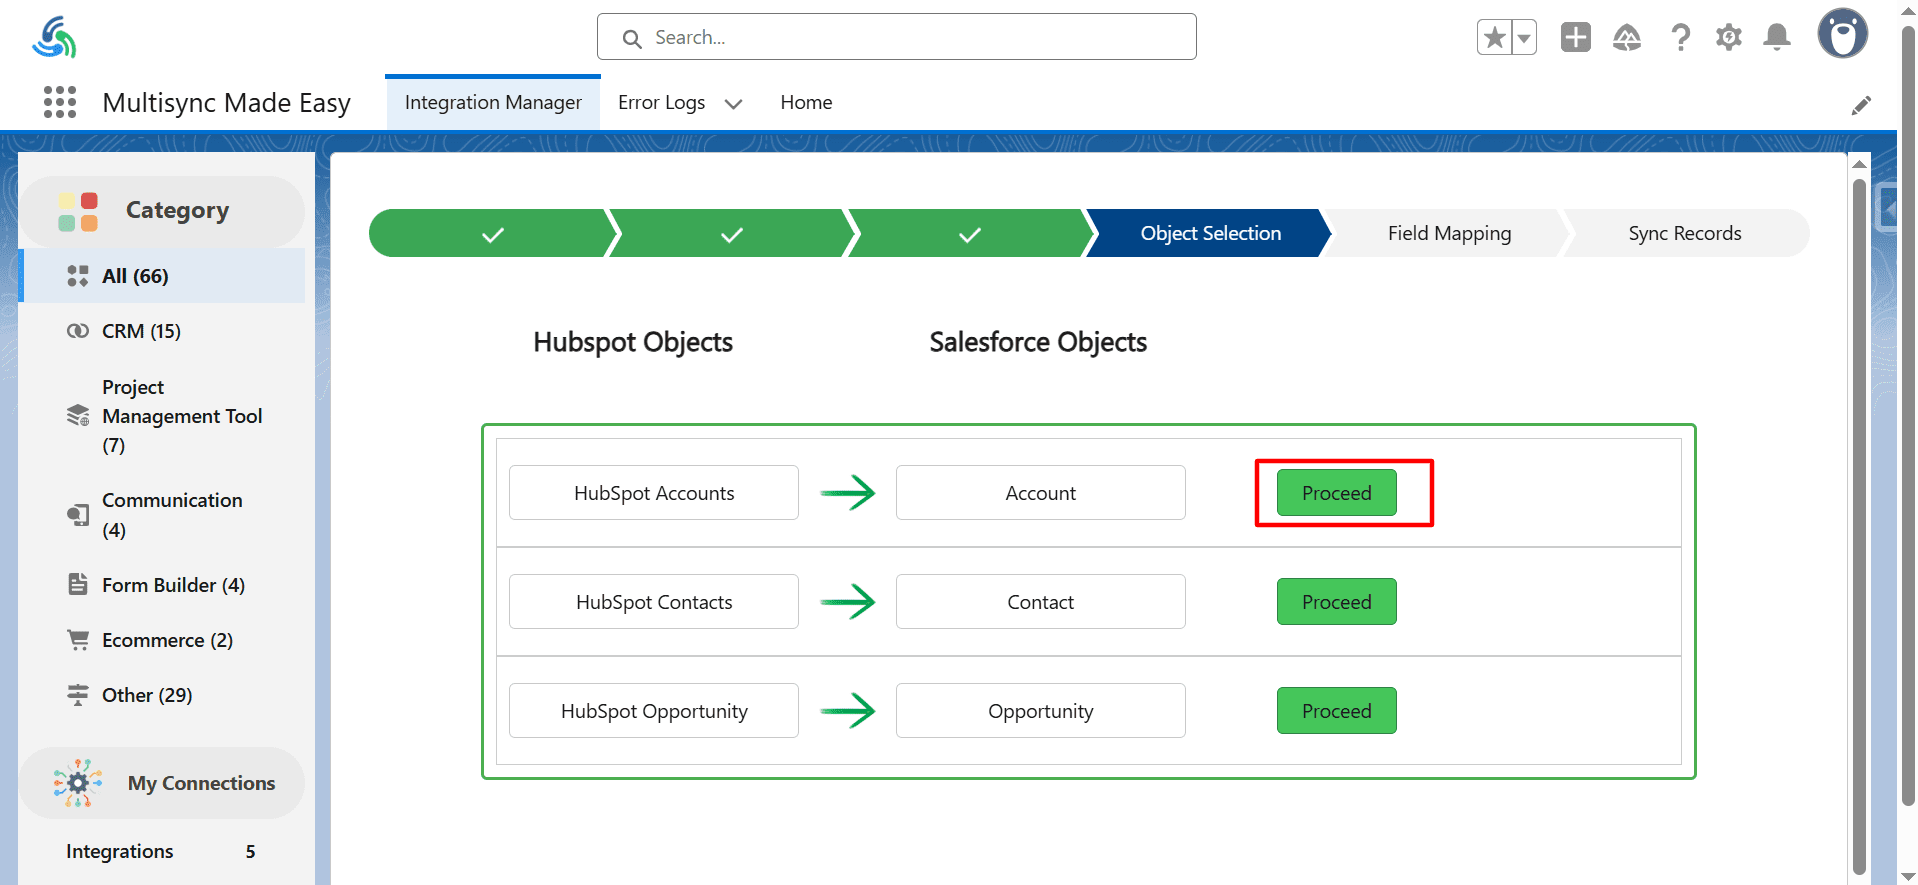
Step 21. Select the object in which you want to store the imported data for importing. Click on the proceed button (here we selected the Account object).
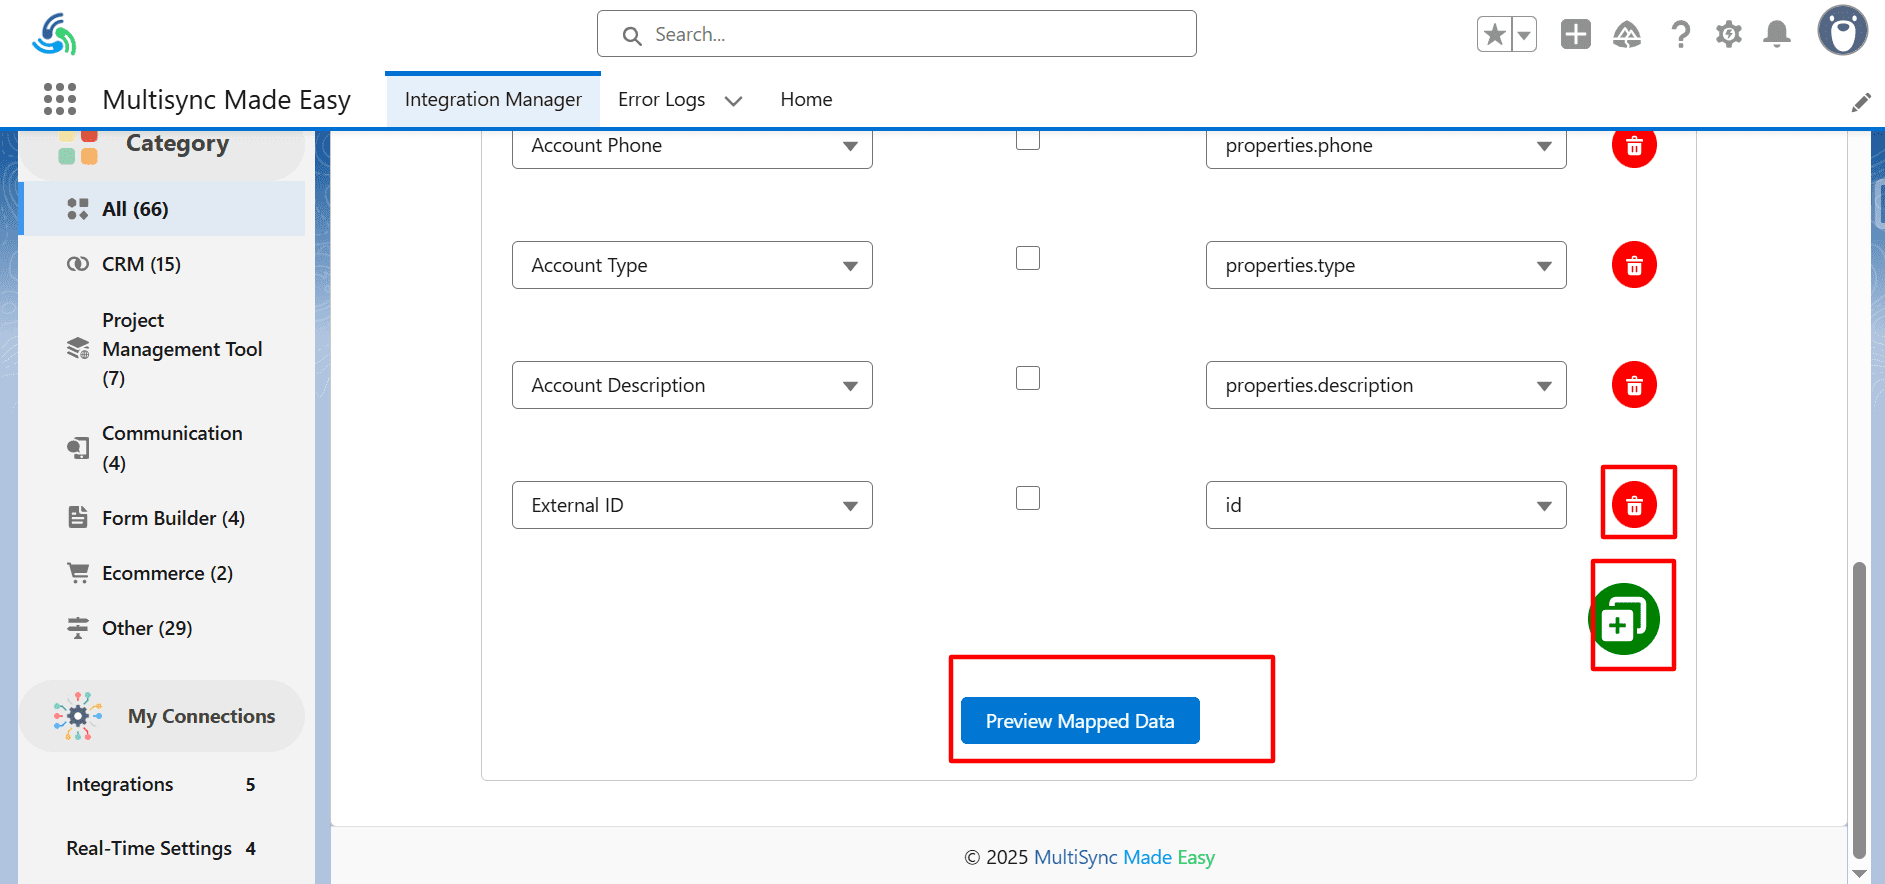
Step 22. You will be navigated to the Field Mapping Page, where you can map the fields of your Salesforce object with the incoming data fields.
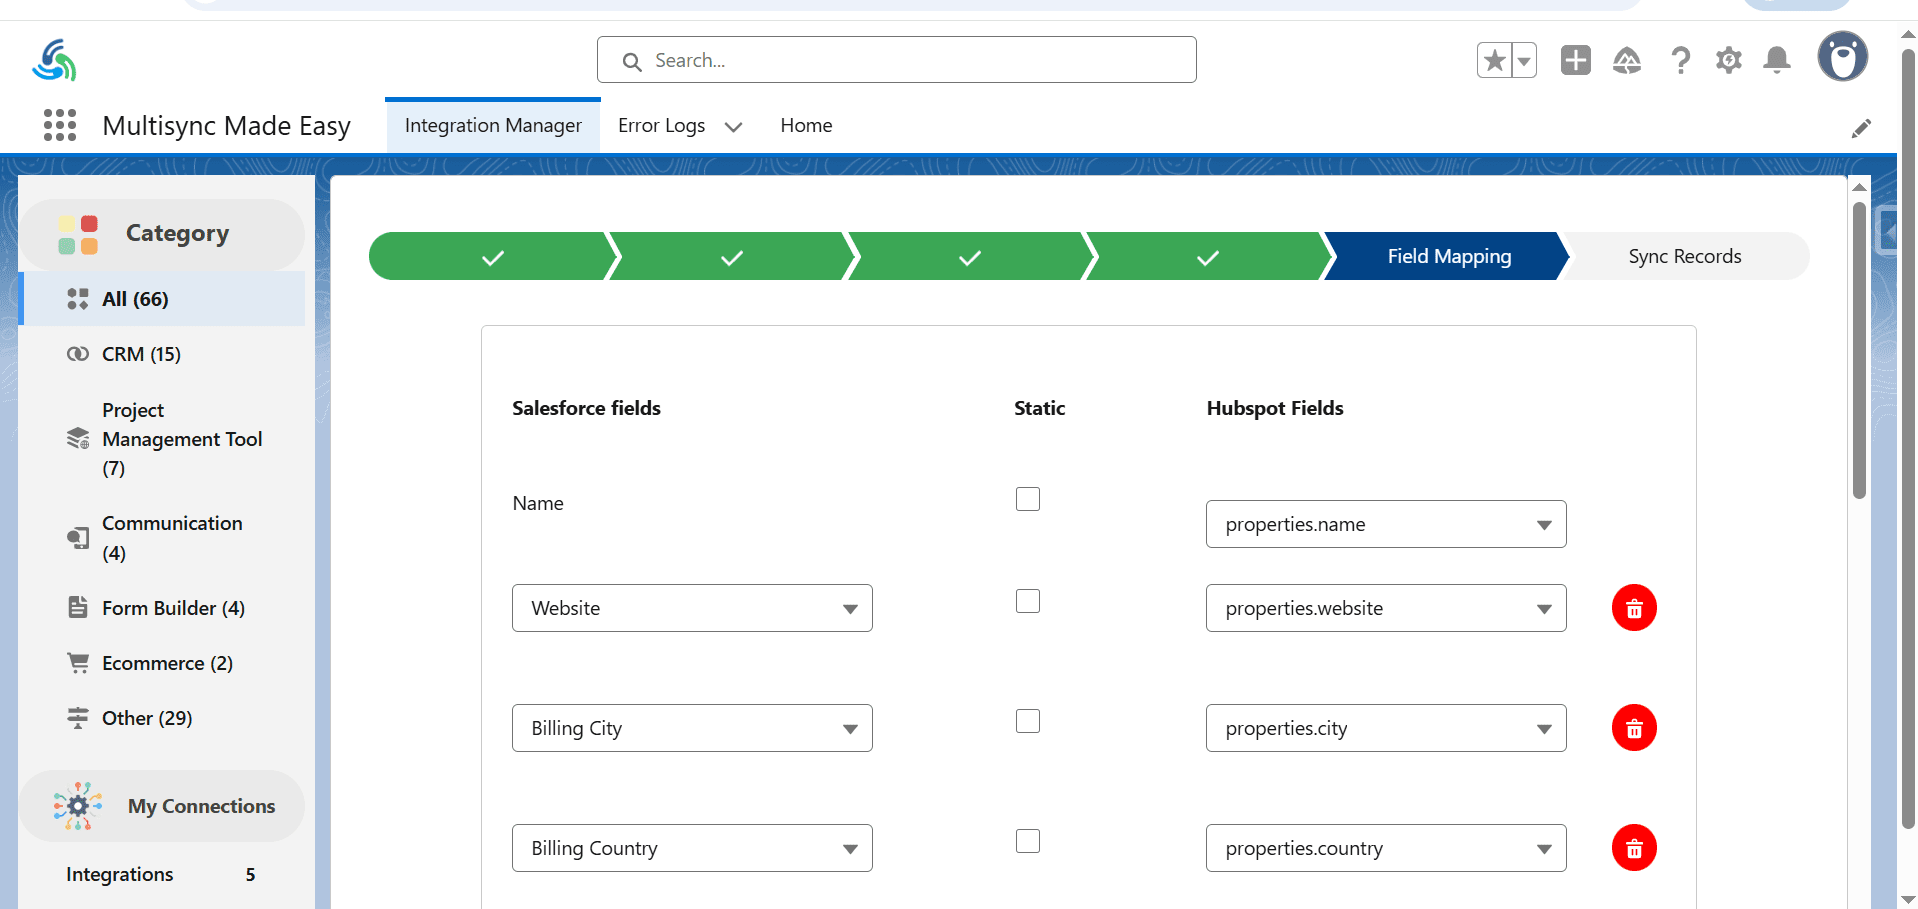
Step 23. The Delete and Add columns buttons are given to you so that you can increase or decrease the columns according to your needs.
Step 24. Click on Preview Mapped Data.
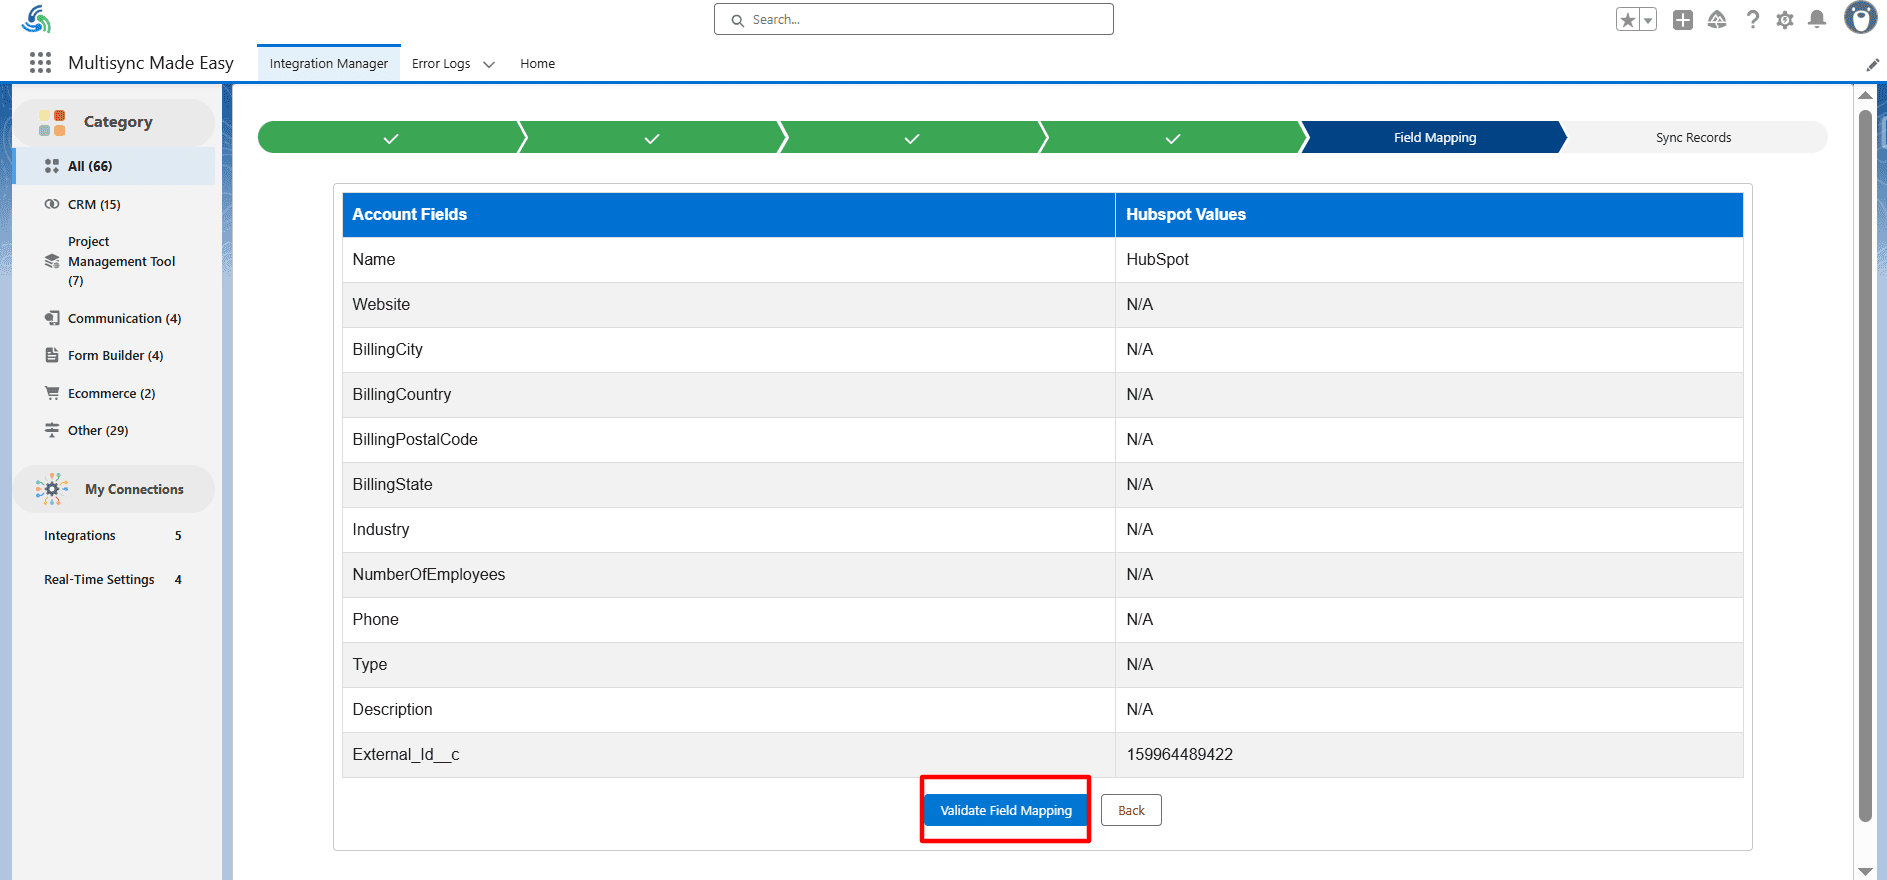
Step 25. Check the Data, and click on Validate Field mapping.
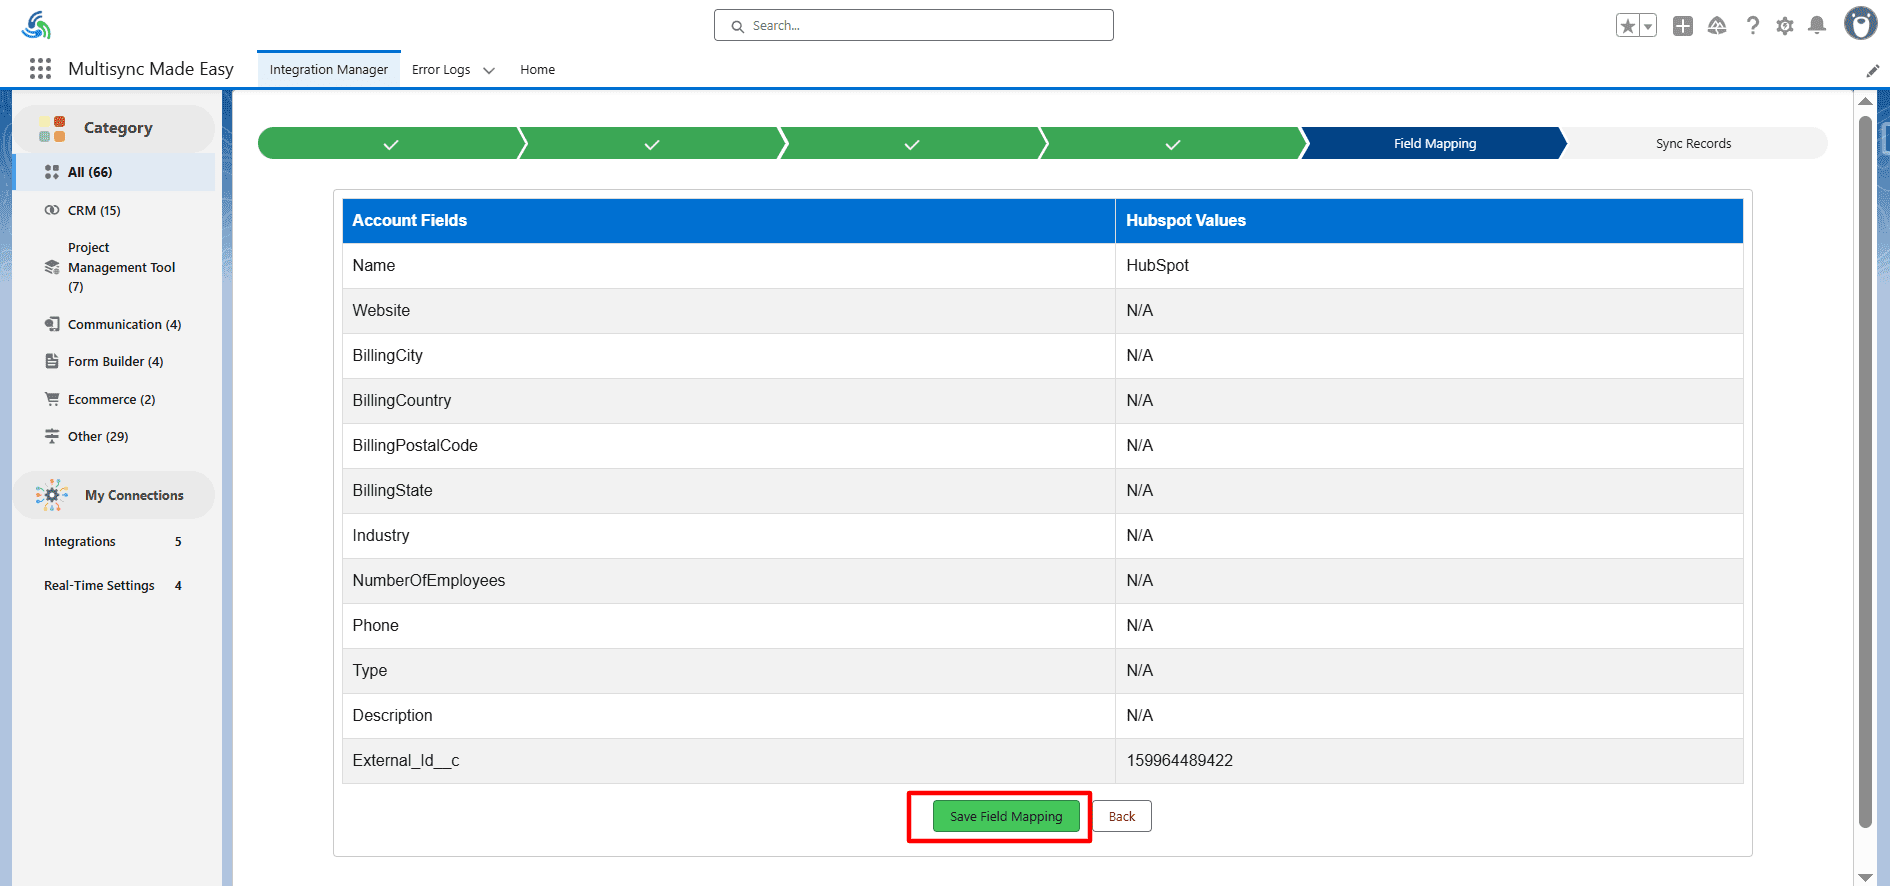
Step 26. Then, Click on Save Field Mapping.
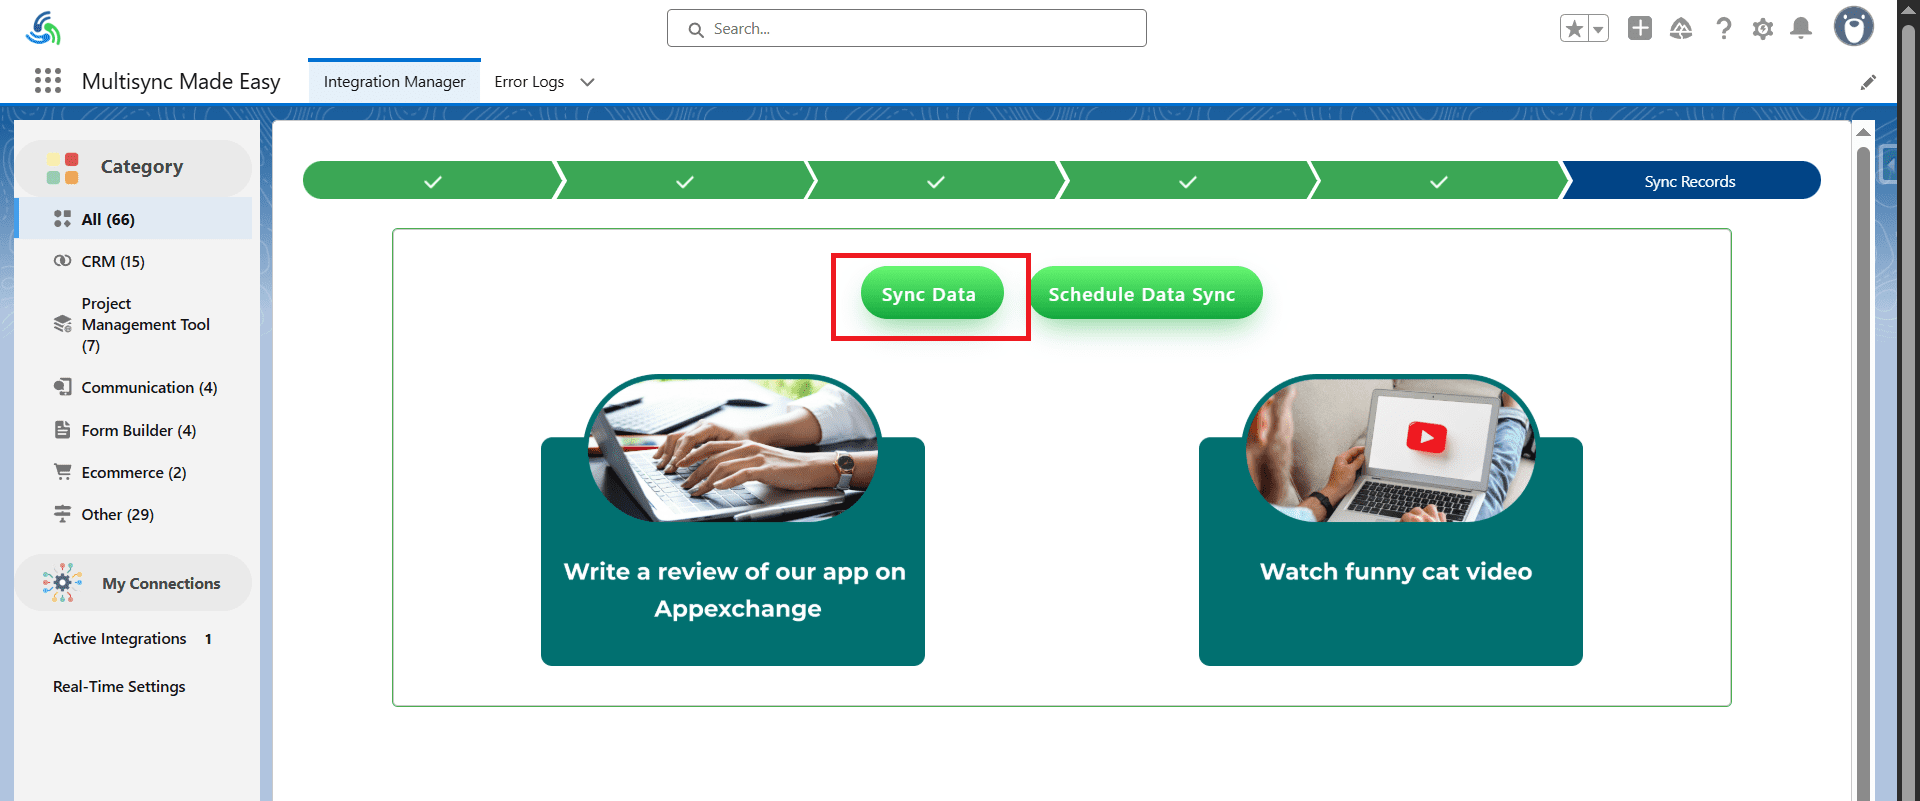
Step 27. You will be redirected to the Sync Data page, where you can sync your data instantly or schedule the data Sync. Click on Sync Data or Schedule Data Sync (here, we clicked Sync Data).
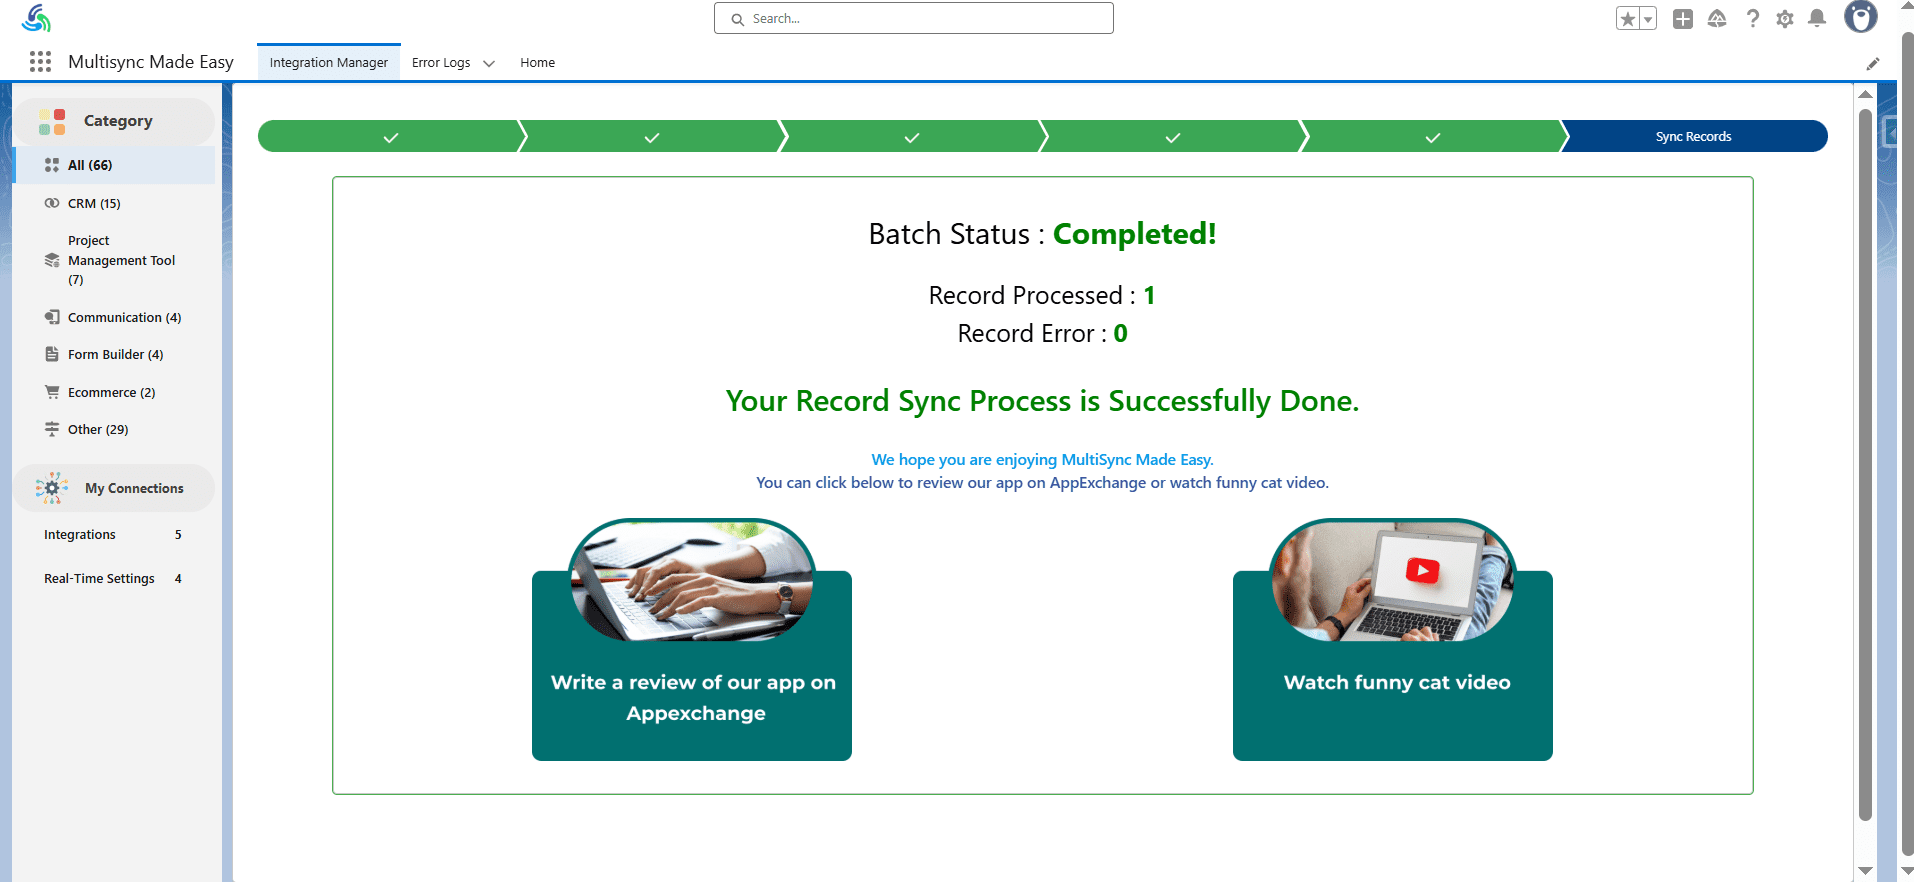
Step 28. After the complete process, the data of the connected app is stored in your Salesforce object with the help of Multi-Sync Made Easy, and you will be redirected to the Sync Completed page.
Once you have completed the steps in the Multi Sync Made Easy User Guide for HubSpot, your data will be fully synced between HubSpot and Salesforce, allowing for smooth, real-time data transfer. Whether you are syncing contact information, account details, or custom data fields, this Salesforce connector app simplifies the process, saving you time and ensuring accuracy.
This HubSpot Salesforce integration leverages Salesforce workflow automation to make sure your workflows are automated. Thank you for using Multi Sync Made Easy – we hope this guide has made your integration process simple and efficient.
Step ahead with our robust and intelligent app that instantly integrates multiple platforms — even the unknown ones!