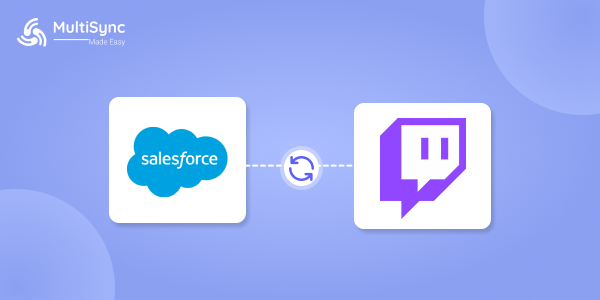
Connecting Twitch with Salesforce usually means dealing with a lot of coding, handling APIs, and fixing tricky errors. But what if you didn’t have to write a single line of code? In this blog, I’ll show you how to easily set up a secure and real-time integration between Twitch and Salesforce using a simple tool called MultiSync Made Easy.
What You’ll Need Before We Start
Step 1: Install the MultiSync Made Easy App
First things first — head over to the Salesforce AppExchange and search for MultiSync Made Easy.
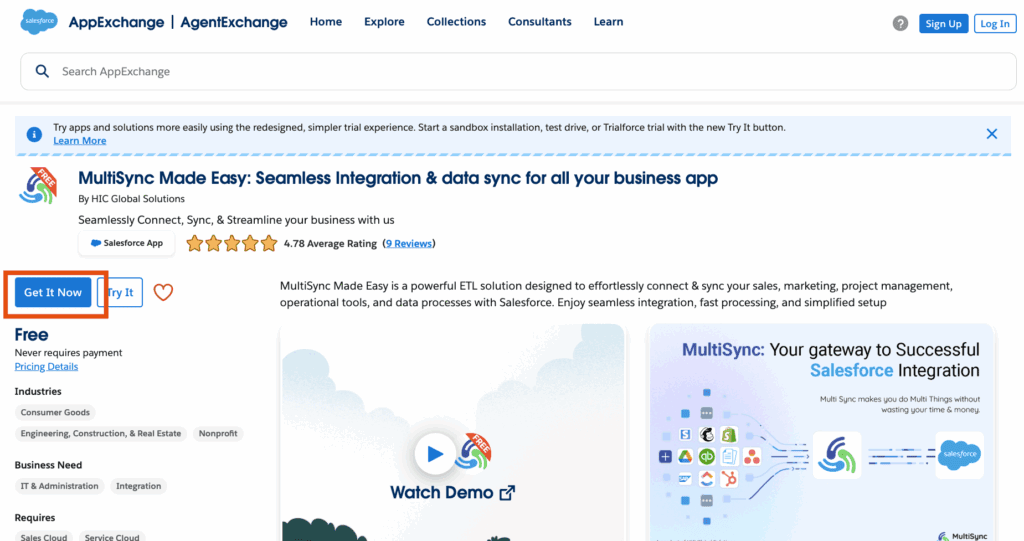
Once you find it, click “Get It Now” and follow the steps to install the app into your Salesforce org. After installation, open the App Launcher (that grid icon in the top left) and search for “MultiSync Made Easy” to access the app.
Step 2: Connect Twitch with MultiSync
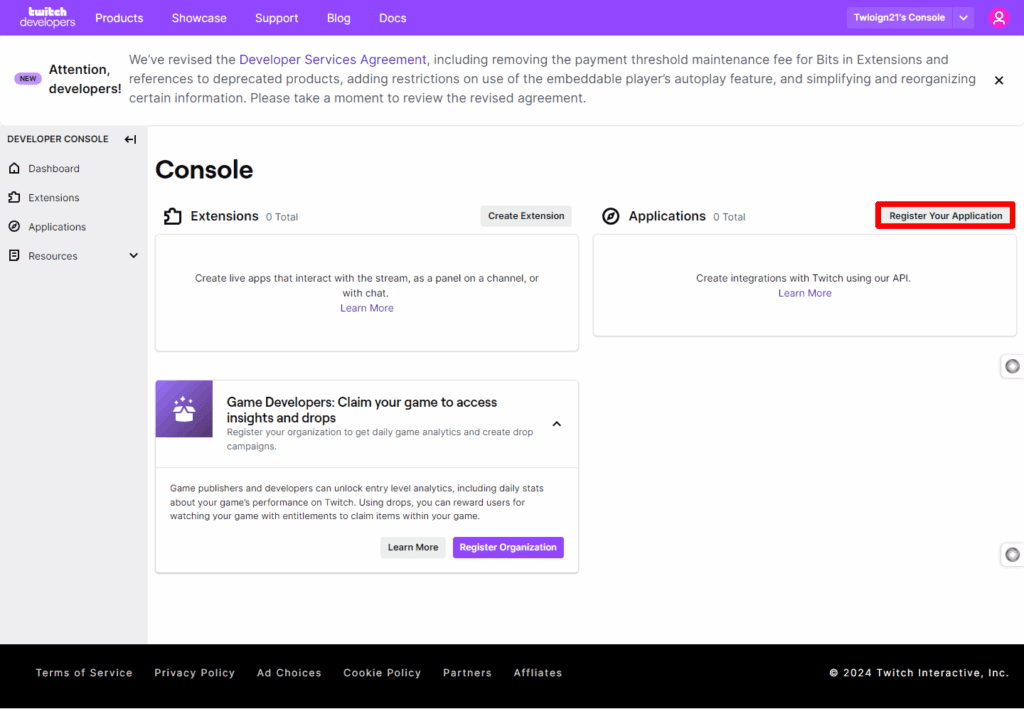
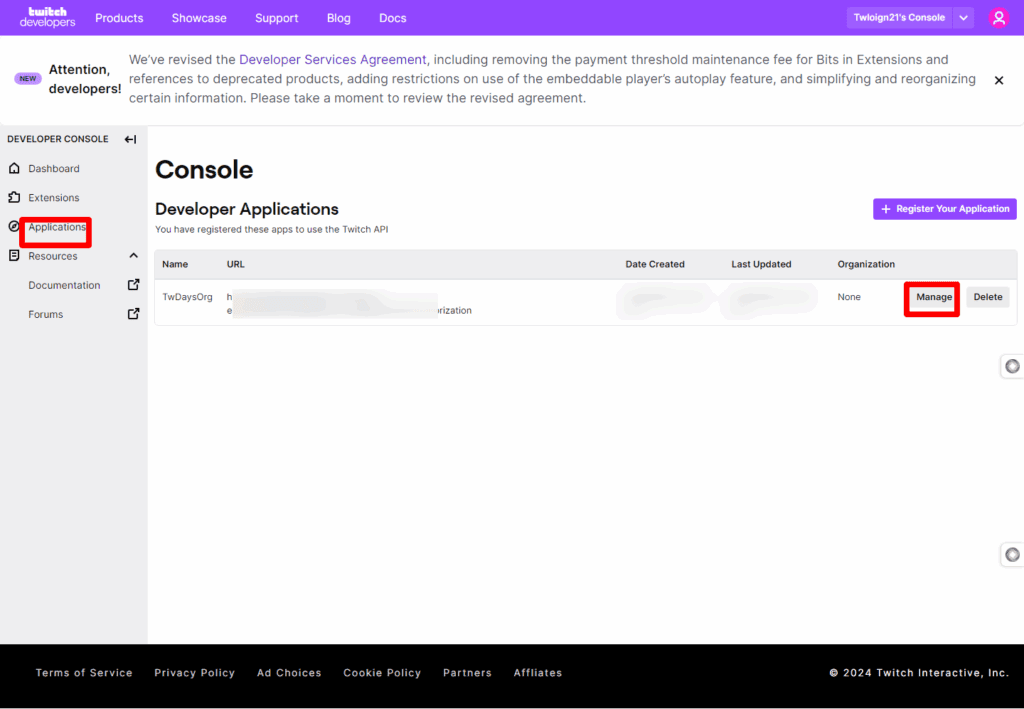
The first step to obtaining an access token is to register your application. Follow these steps:
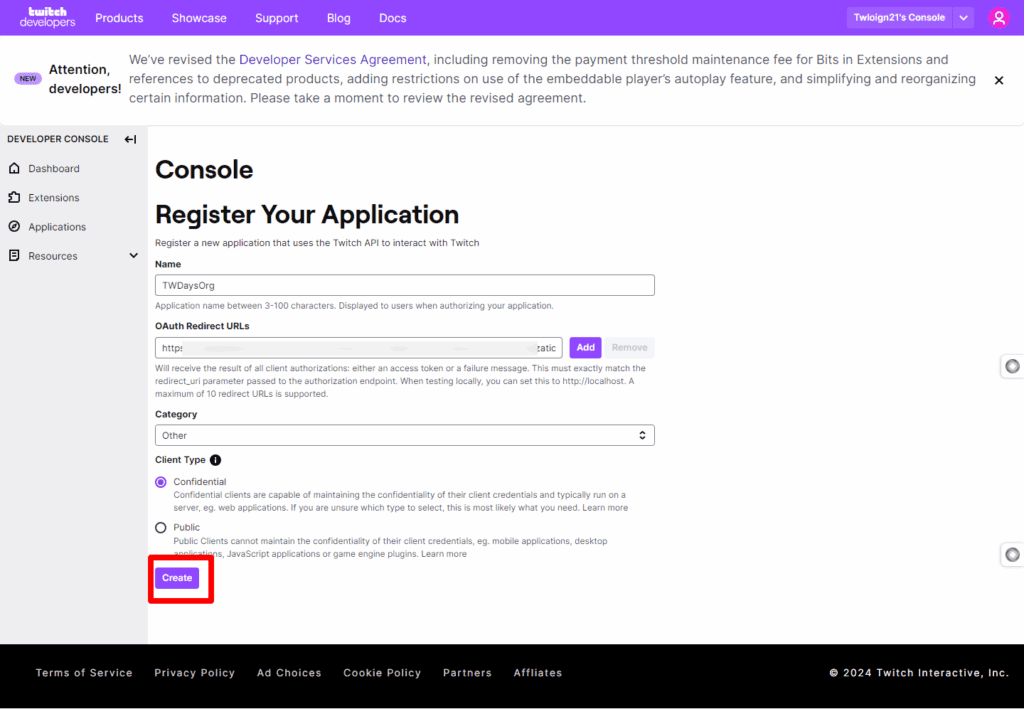
Now, Enter the required details, including your Callback URL, and then click Create to register the application.
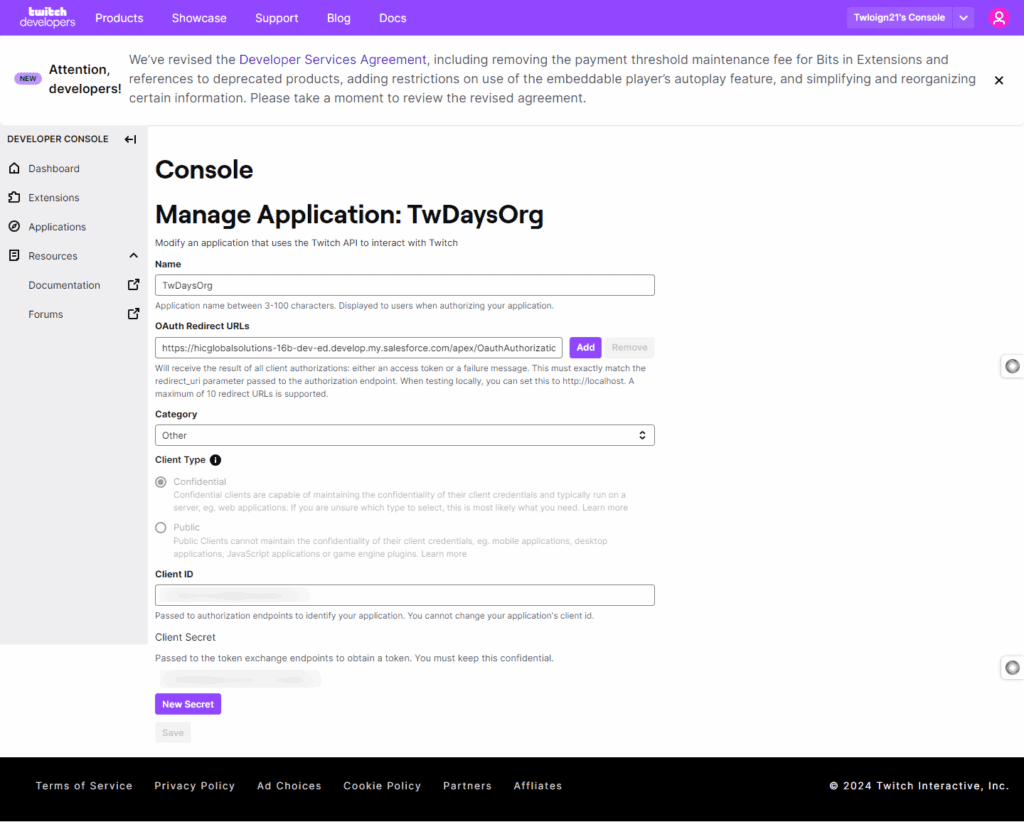
Once the application is created:
Generate your Client’s Secret.

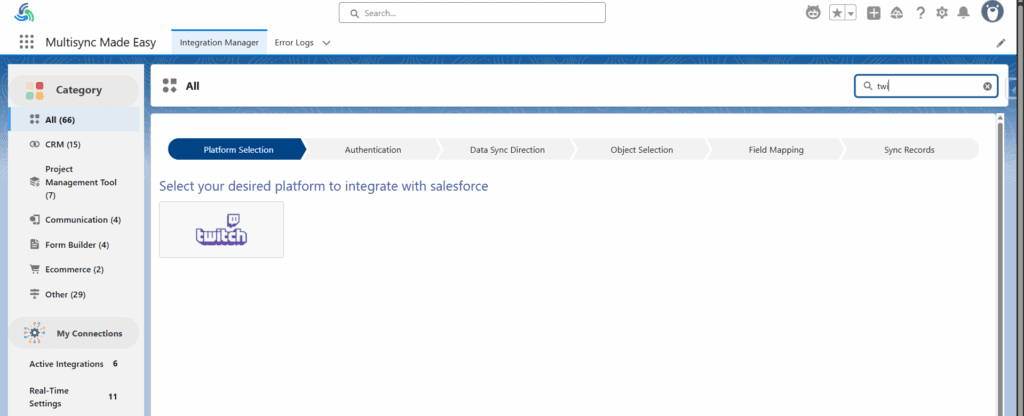
Now, Go to the multisync Home Page and search for the platform search for Twitch.
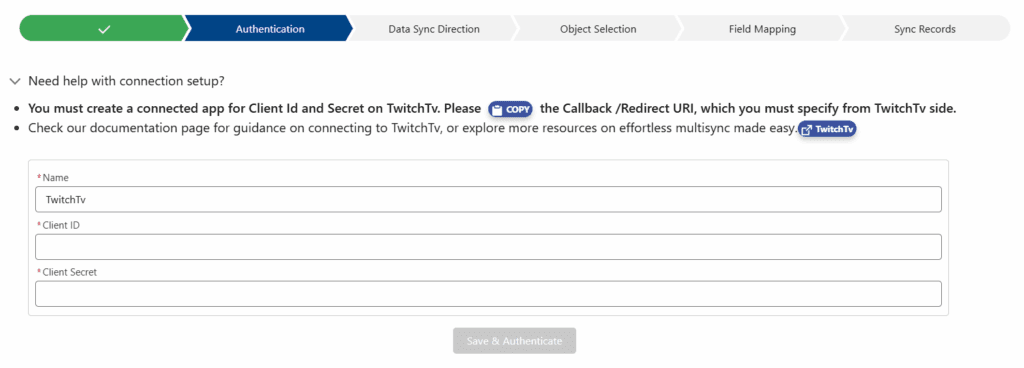
Now paste your Client Id, Client Secret and name your integration, and then click on the save and authenticate button.
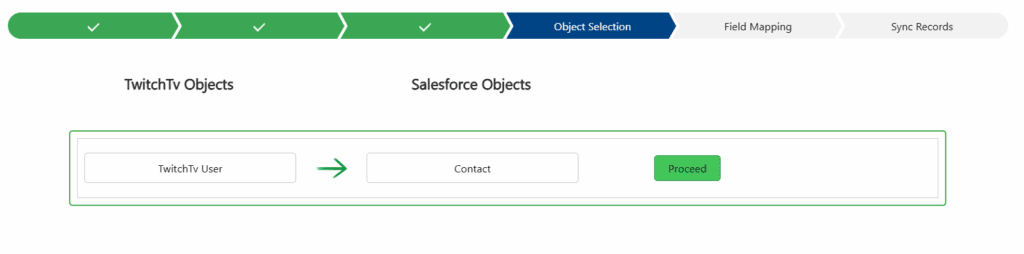
Step 3: Map Salesforce Objects with Twitch
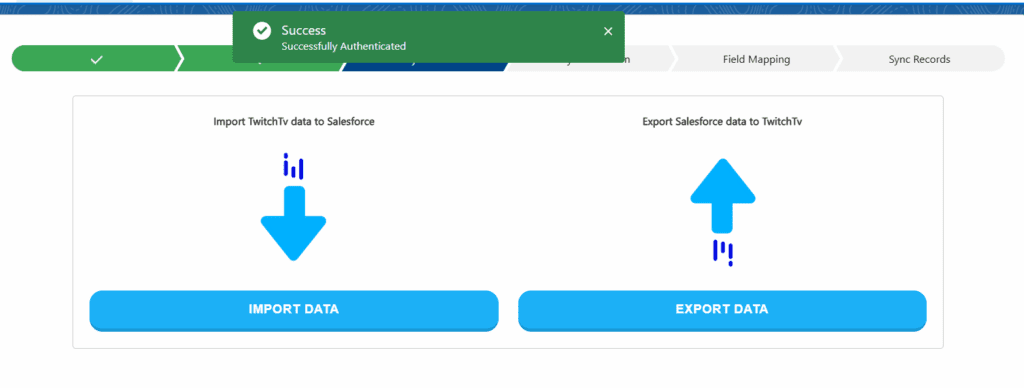
Please select whether you would like to import or export data.
After that, select the Proceed button for the object you want to import data.
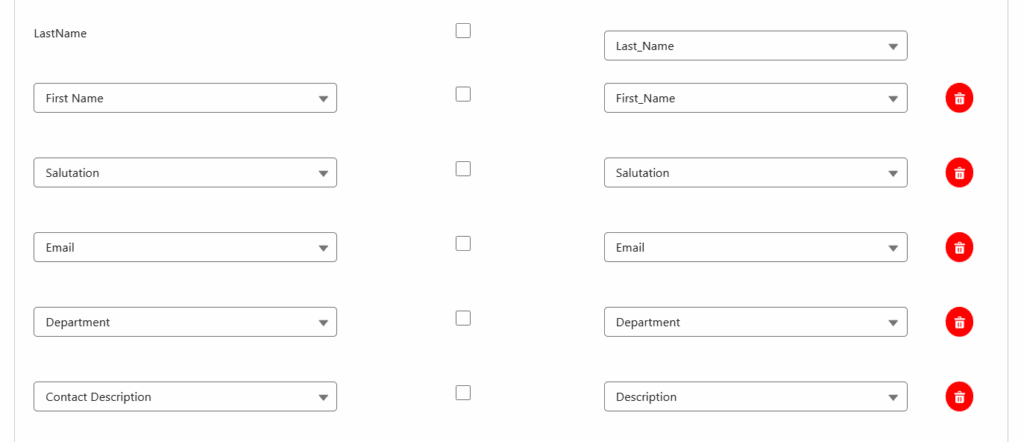
Then you can change the field mapping or go with the default one.
Step 4: Sync Data
We can schedule the data sync for a specific time, or we can sync it instantly.
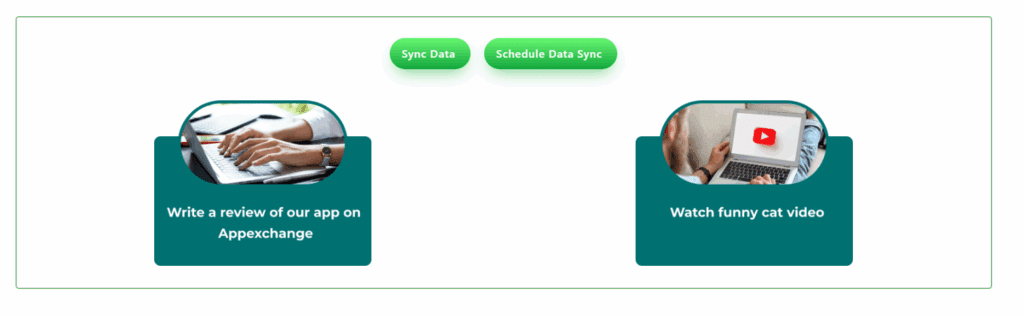
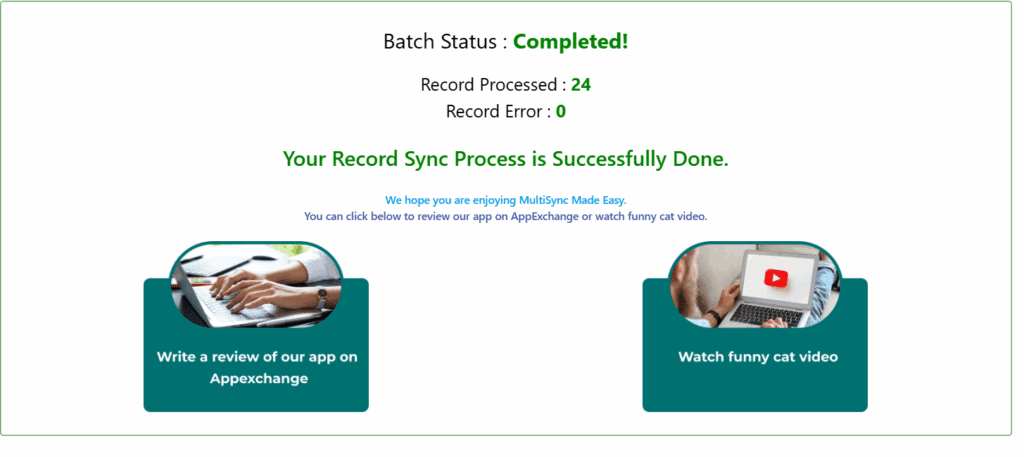
And then sync data, then all the data with the selected object is inserted in Salesforce, and you can monitor it with real-time progress.
Connecting Twitch with Salesforce doesn’t have to be complicated, and with MultiSync Made Easy, it isn’t. You can sync data between different objects, send info to Twitch, and even keep things up to date in real time using webhooks; all without writing a single line of code.
If you’re looking for a simple, no-stress way to integrate Twitch with Salesforce, this tool is definitely worth checking out.
Step ahead with our robust and intelligent app that instantly integrates multiple platforms — even the unknown ones!